
一、整体流程
1、安装客户端及修改配置文件,测试
2、web页面添加主机,关联模板
3、调试
二、配置客户端
1、配置zbx源
[root@zabbix-server01 ~]# rpm -ivh https://mirrors.tuna.tsinghua.edu.cn/zabbix/zabbix/6.0/rhel/7/x86_64/zabbix-release-6.0-4.el7.noarch.rpm
[root@zabbix-server01 ~]# sed -i 's#https://repo.zabbix.com/zabbix#https://mirrors.tuna.tsinghua.edu.cn/zabbix/zabbix#g' /etc/yum.repos.d/zabbix.repo
2、安装客户端
| [root@zabbix-server01 ~]# yum install -y zabbix-agent2 |
|---|
3、配置客户端
[root@zabbix-client01 ~]# sed -i 's#Server=127.0.0.1#Server=172.16.1.40#g' /etc/zabbix/zabbix_agent2.conf
[root@zabbix-client01 ~]# sed -i 's#ServerActive=127.0.0.1#ServerActive=172.16.1.40#g' /etc/zabbix/zabbix_agent2.conf
结果查看
[root@zabbix-client01 ~]# grep -n ^Server /etc/zabbix/zabbix_agent2.conf
80:Server=172.16.1.40
133:ServerActive=172.16.1.40
4、启动
[root@zabbix-server01 ~]# systemctl enable zabbix-agent2.service
[root@zabbix-server01 ~]# systemctl start zabbix-agent2.service
结果验证
[root@zabbix-client01 ~]# ps -ef | grep agent2
zabbix 1968 1 0 09:53 ? 00:00:00 /usr/sbin/zabbix_agent2 -c /etc/zabbix/zabbix_agent2.conf
root 1992 1764 0 09:53 pts/0 00:00:00 grep --color=auto agent2
三、web界面添加主机
1、添加主机
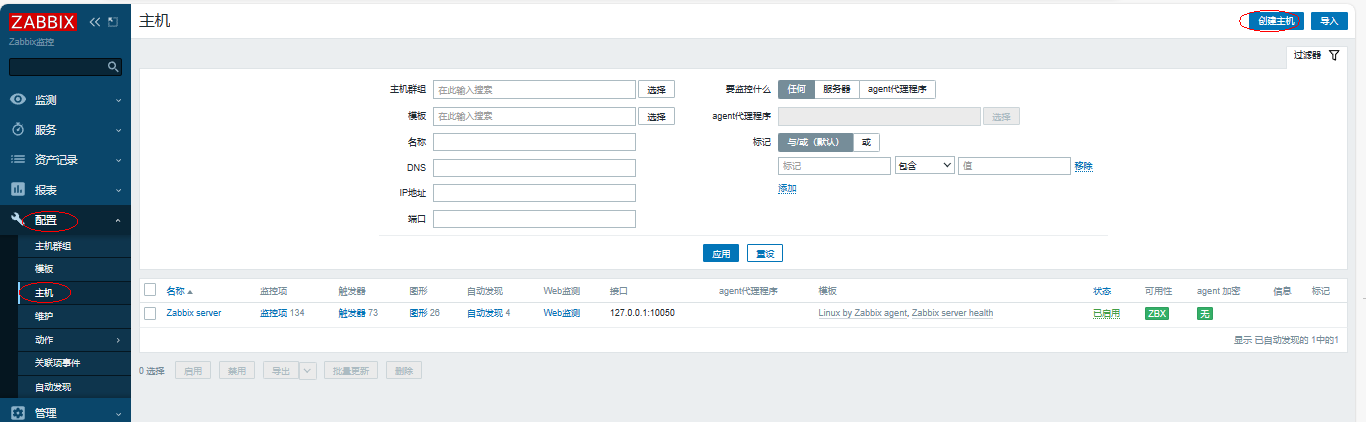
依次点击【配置】-【主机】-【创建主机】
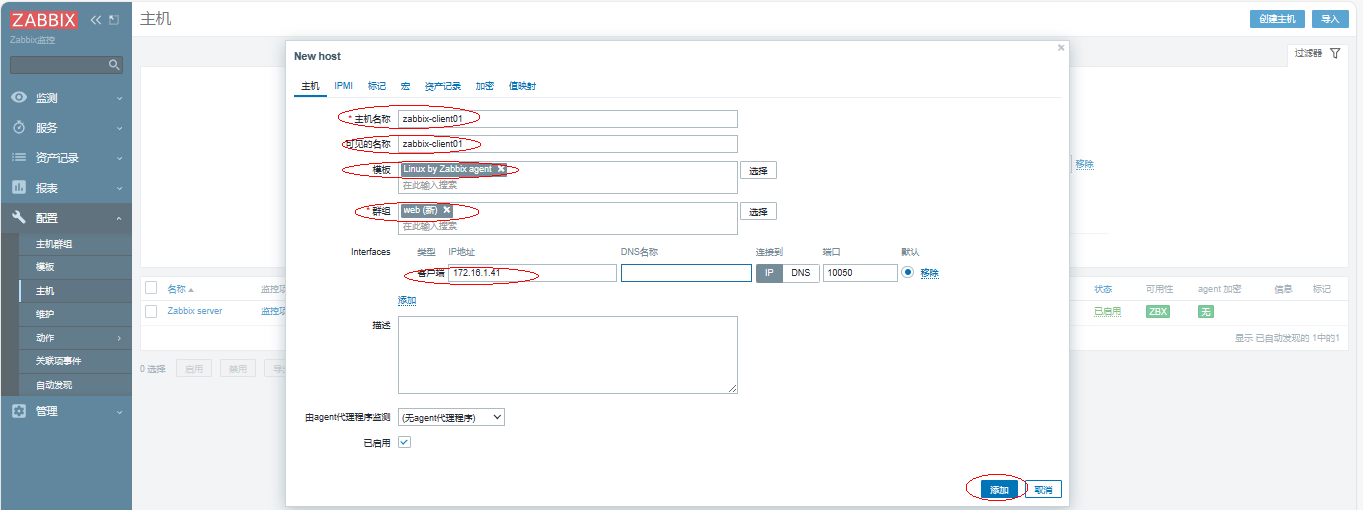
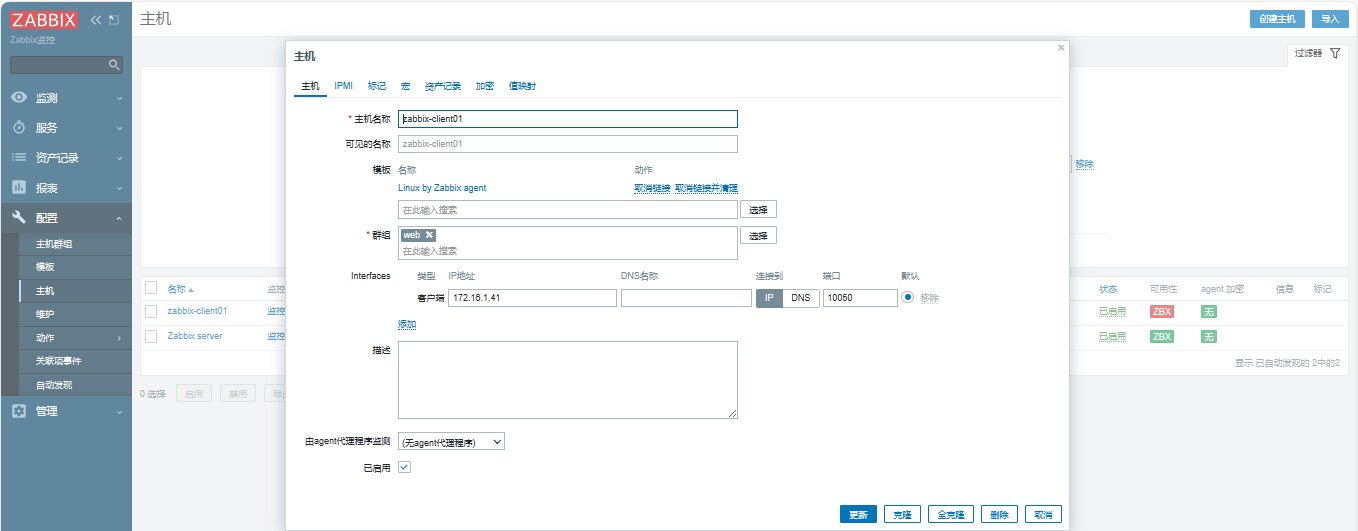
2、填写主机信息
如果主机名没有做解析,需要做解析:
[root@zabbix-server01 ~]# cat /etc/hosts
127.0.0.1 localhost localhost.localdomain localhost4 localhost4.localdomain4
::1 localhost localhost.localdomain localhost6 localhost6.localdomain6
172.16.1.40 zabbix-server01
172.16.1.41 zabbix-client01
[root@zabbix-client01 ~]# cat /etc/hosts
127.0.0.1 localhost localhost.localdomain localhost4 localhost4.localdomain4
::1 localhost localhost.localdomain localhost6 localhost6.localdomain6
172.16.1.40 zabbix-server01
172.16.1.41 zabbix-client01
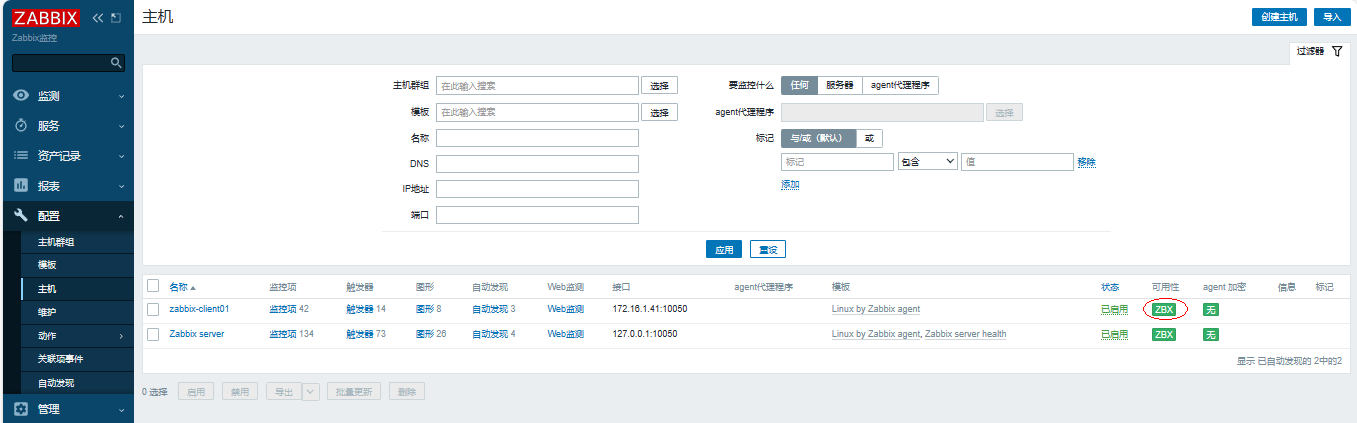
3、等待大约1分钟后,查看【可用性】颜色会变绿(如果变红,需要检查相关配置)

四、故障案例
4.1 zabbix客户端监控故障提示Connection reset by peer
4.1.1 故障背景
当在web界面上添加主机后,显示Get value from agent failed: ZBX_TCP_READ() failed: [104] Connection reset by peer

4.1.2 排查流程
1、检查web界面上主机信息是否填写正确,观察到没有任何问题
2、检查zabbix服务端到客户端的连接是否正常,观察到没有任何问题
[root@zabbix-server01 ~]# ping -c 1 zabbix-client01
PING zabbix-client01 (172.16.1.41) 56(84) bytes of data.
64 bytes from zabbix-client01 (172.16.1.41): icmp_seq=1 ttl=64 time=0.179 ms
--- zabbix-client01 ping statistics ---
1 packets transmitted, 1 received, 0% packet loss, time 0ms
rtt min/avg/max/mdev = 0.179/0.179/0.179/0.000 ms
3、检查zabbix服务端是否能正常连接客户端的端口10050,观察到正常
[root@zabbix-server01 ~]# nmap -p 10050 zabbix-client01
Starting Nmap 6.40 ( http://nmap.org ) at 2024-01-25 10:29 CST
Nmap scan report for zabbix-client01 (172.16.1.41)
Host is up (0.00015s latency).
PORT STATE SERVICE
10050/tcp open unknown
MAC Address: 00:50:56:21:CB:8B (VMware)
Nmap done: 1 IP address (1 host up) scanned in 0.46 seconds
4、检查zabbix客户端端口与进程
[root@zabbix-client01 ~]# ps -ef | grep agent2
zabbix 2288 1 0 10:16 ? 00:00:00 /usr/sbin/zabbix_agent2 -c /etc/zabbix/zabbix_agent2.conf
root 2367 1764 0 10:30 pts/0 00:00:00 grep --color=auto agent2
[root@zabbix-client01 ~]# ss -ntlup | grep 10050
tcp LISTEN 0 128 [::]:10050 [::]:* users:(("zabbix_agent2",pid=2288,fd=9))
5、检查zabbix客户端日志输出,观察到服务端地址配置错误
[root@zabbix-client01 ~]# tailf /var/log/zabbix/zabbix_agent2.log
2024/01/25 10:24:01.330856 failed to accept an incoming connection: connection from "172.16.1.40" rejected, allowed hosts: "172.16.1.45"
检查配置文件
[root@zabbix-client01 ~]# grep -n ^Server /etc/zabbix/zabbix_agent2.conf
80:Server=172.16.1.45
133:ServerActive=172.16.1.45
修改配置文件中服务器地址为172.16.1.40
[root@zabbix-client01 ~]# vim +80 /etc/zabbix/zabbix_agent2.conf
Server=172.16.1.40
[root@zabbix-client01 ~]# vim +133 /etc/zabbix/zabbix_agent2.conf
ServerActive=172.16.1.40
重启服务
| [root@zabbix-client01 ~]# systemctl restart zabbix-agent2.service |
|---|
6、再次检查web界面,观察到【可用性】变绿