

一、APISIX Dashboard 安装和使用
1.1 APISIX Dashboard 说明
https://apisix.apache.org/docs/apisix/next/dashboard/
https://apisix.apache.org/zh/docs/dashboard/USER GUIDE/
Apache APISIX Dashboard是基于WEB的可视化平台,用于监控、管理Apache APISIX
Apache APISIX Dashboard可以让用户尽可能直观、便捷地通过可视化界面操作Apache APISIX
通过Dashboard,我们能够:
- 创建并管理服务、上游、路由、应用、证书
- 全局插件等模块
- 配合内置的80多种插件,可精细化控制流量
- 支持配置自定义插件
- 围绕API全生命周期管理提供解决方案,通过持续地更新、升级,更好地为用户赋能
- 兼容OpenAPI 3.0,支持路由的导入、导出
APISIX 和 APISIX Dashboard 及ETCD

1.2 安装 APISIX Dashboard
https://apisix.apache.org/zh/docs/dashboard/install/ 支持多种安装方法
- APISIX 内置 (APISIX-3.13.0以后版内置了 Dashboard 无需安装)
- Docker
- RPM包安装,不支持Debian
- 源码编译安装
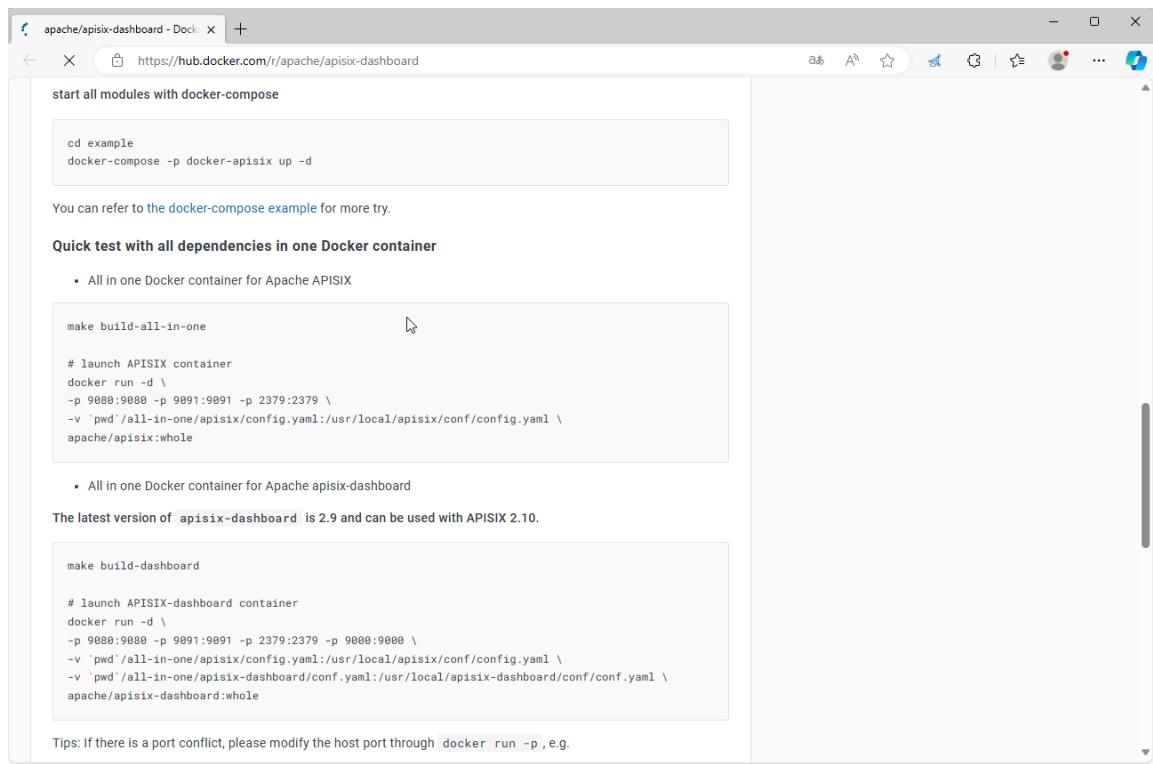
1.2.1 Docker 安装
https://apisix.apache.org/zh/docs/dashboard/install/#docker
https://hub.docker.com/r/apache/apisix-dashboard
docker pull apache/apisix-database
docker run --d --name dashboard \
-p 9000:9000 \
-v <CONFIG_FILE>:/usr/local/apache-database/conf/conf.yaml \
apache/apisix-database
范例:基于Docker部署APISIX Dashboard和基于二进制包安装的APISIX
#拉取镜像
[root@ubuntu2404 ~]#apt update && apt -y install docker.io
[root@ubuntu2404 ~]#docker pull registry.cn-beijing.aliyuncs.com/wangxiaochun/apisix-dashboard:3.0.1-alpine
[root@ubuntu2404 ~]#docker pull apache/apisix-dashboard:3.0.1-alpine
#直接启动容器会有问题
[root@ubuntu2404 ~]#docker run -d --name apisix-dashboard registry.cn-beijing.aliyuncs.com/wangxiaochun/apisix-dashboard:3.0.1-alpine
[root@ubuntu2404 ~]#docker run -d --name apisix-dashboard apache/apisix-dashboard:3.0.1-alpine
0d6960d8c0d0e6ec2c039cb934b51740a0aabfbc4a329b6aef3115ed1eae005c
#默认无法连接本地的etcd
[root@ubuntu2404 ~]#docker logs apisix-dashboard
{"level":"warn","ts":"2023-12-06T03:06:10.361Z","logger":"etcd-client","caller":"v3@v3.5.5/retry_interceptor.go:62","msg":"retrying of unary invoker failed","target":"etcd-endpoints://0xc0000efa40/127.0.0.1:2379","attempt":0,"error":"rpc error: code = DeadlineExceeded desc = latest balancer error: last connection error: connection error: desc = \"transport: Error while dialing dial tcp 127.0.0.1:2379: connect: connection refused\""}
Error: etcd get failed: context deadline exceeded
Usage:
manager-api [flags]
manager-api [command]
Available Commands:
completion Generate the autocompletion script for the specified shell
help Help about any command
version show manager-api version
Flags:
-c, --config string config file
-h, --help help for manager-api
-p, --work-dir string current work directory (default ".")
Use "manager-api [command] --help" for more information about a command.
etcd get failed: context deadline exceeded
#使用宿主机网络启动,连接宿主机的ETCD
[root@ubuntu2404 ~]#docker run -d --network host --name apisix-dashboard registry.cn-beijing.aliyuncs.com/wangxiaochun/apisix-dashboard:3.0.1-alpine
[root@ubuntu2404 ~]#docker run -d --network host --name apisix-dashboard apache/apisix-dashboard:3.0.1-alpine
#查看日志
[root@ubuntu2404 ~]#docker logs apisix-dashboard
The manager-api is running successfully!
Version : 3.0.1
GitHash : 397c0cb5
Config File: /usr/local/apisix-dashboard/conf/conf.yaml
Listen : 0.0.0.0:9000
Loglevel: warn
ErrorLogFile: /usr/local/apisix-dashboard/logs/error.log
AccessLogFile: /usr/local/apisix-dashboard/logs/access.log
[root@ubuntu2404 ~]#docker ps
CONTAINER ID IMAGE COMMAND CREATED STATUS PORTS NAMES
d6f896595e2c apache/apisix-dashboard:3.0.1-alpine "/usr/local/apisix-d…" About a minute ago Up About a minute apisix-dashboard
#默认不允许远程访问apix dashboard,只允许本地127.0.0.1访问
[root@ubuntu2404 ~]#curl http://10.0.0.200:9000/
{"Code":20002,"Message":"IP address not allowed","Data":null,"SourceSrv":""}
[root@ubuntu2404 ~]#curl http://127.0.0.1:9000/ -I
HTTP/1.1 200 OK
Accept-Ranges: bytes
Content-Length: 6712
Content-Security-Policy: default-src 'self'; script-src 'self' 'unsafe-eval' 'unsafe-inline'; style-src 'self' 'unsafe-inline'; img-src 'self' data:
Content-Type: text/html; charset=utf-8
Last-Modified: Wed, 12 Apr 2023 02:49:17 GMT
X-Frame-Options: deny
X-Request-Id: 0a5814e9-2f89-41fc-a8dc-58b305d0c636
Date: Mon, 16 Dec 2024 03:56:08 GMT
#生成dashboard配置文件
#方法1:从容器出提取conf.yaml文件
[root@ubuntu2404 ~]#docker cp apisix-dashboard:/usr/local/apisix-dashboard/conf/conf.yaml .
[root@ubuntu2404 ~]#vim conf.yaml
......
conf:
listen:
host: 0.0.0.0 #`manager api` listening ip or host name
port: 9000 #`manager api` listening port
allow_list: #If we don't set any IP list, then any IP access is allowed by default.
- 0.0.0.0/0 #修改此行,开放远程访问
#方法2:从github网络下载旧版conf.yaml,注意:新版没有此文件
[root@ubuntu2404 ~]#wget https://github.com/apache/apisix-docker/archive/refs/heads/release/apisix-2.15.0.zip
[root@ubuntu2404 ~]#unzip apisix-2.15.0.zip
[root@ubuntu2404 ~]#cp apisix-docker-master/example/dashboard_conf/conf.yaml .
#修改dashboard配置文件
[root@ubuntu2404 ~]#vim conf.yaml
......
conf:
listen:
host: 0.0.0.0 #`manager api` listening ip or host name
port: 9000 #`manager api` listening port
allow_list: #If we don't set any IP list, then any IP access is allowed by default.
- 0.0.0.0/0 #开放远程访问
etcd:
endpoints: #supports defining multiple etcd host addresses for an etcd cluster
#- "http://etcd:2379" #原内容
- "http://127.0.0.1:2379" #修改此行
......
[root@ubuntu2404 ~]#docker rm -f apisix-dashboard
#用修改过的配置覆盖容器内的原有的配置
#阿里镜像仓库
[root@ubuntu2404 ~]#docker run -d --network host --name apisix-dashboard -v ./conf.yaml:/usr/local/apisix-dashboard/conf/conf.yaml registry.cn-beijing.aliyuncs.com/wangxiaochun/apisix-dashboard:3.0.1-alpine
#官方镜像仓库
[root@ubuntu2404 ~]#docker run -d --network host --name apisix-dashboard -v ./conf.yaml:/usr/local/apisix-dashboard/conf/conf.yaml apache/apisix-dashboard:3.0.1-alpine
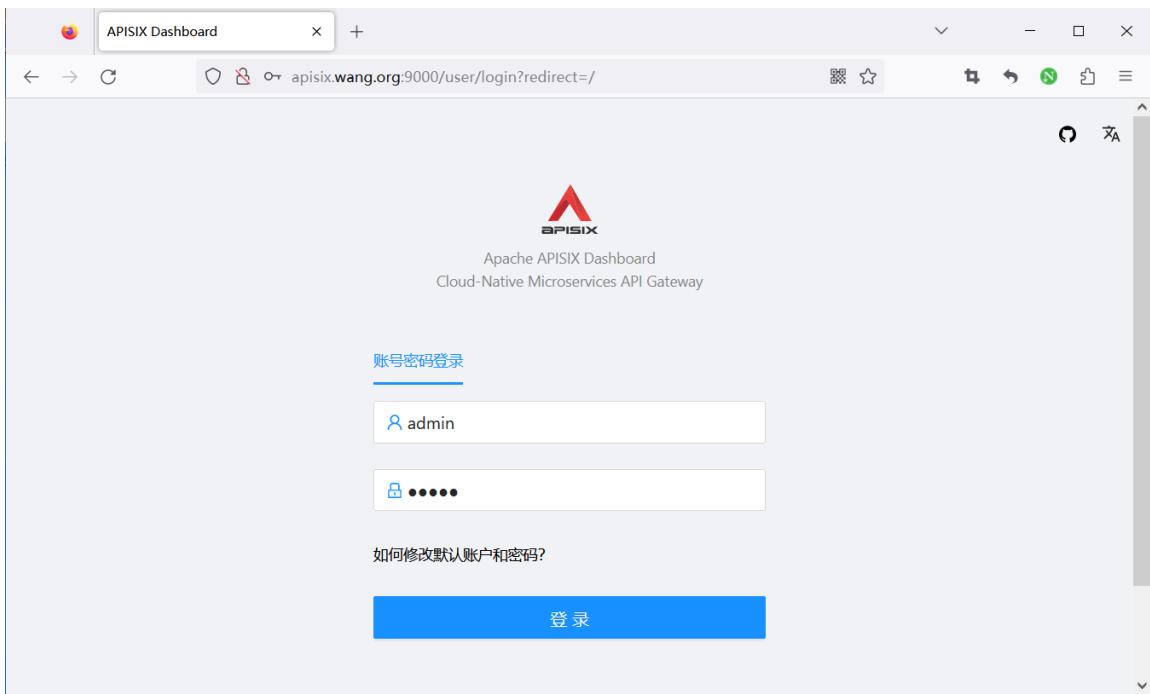
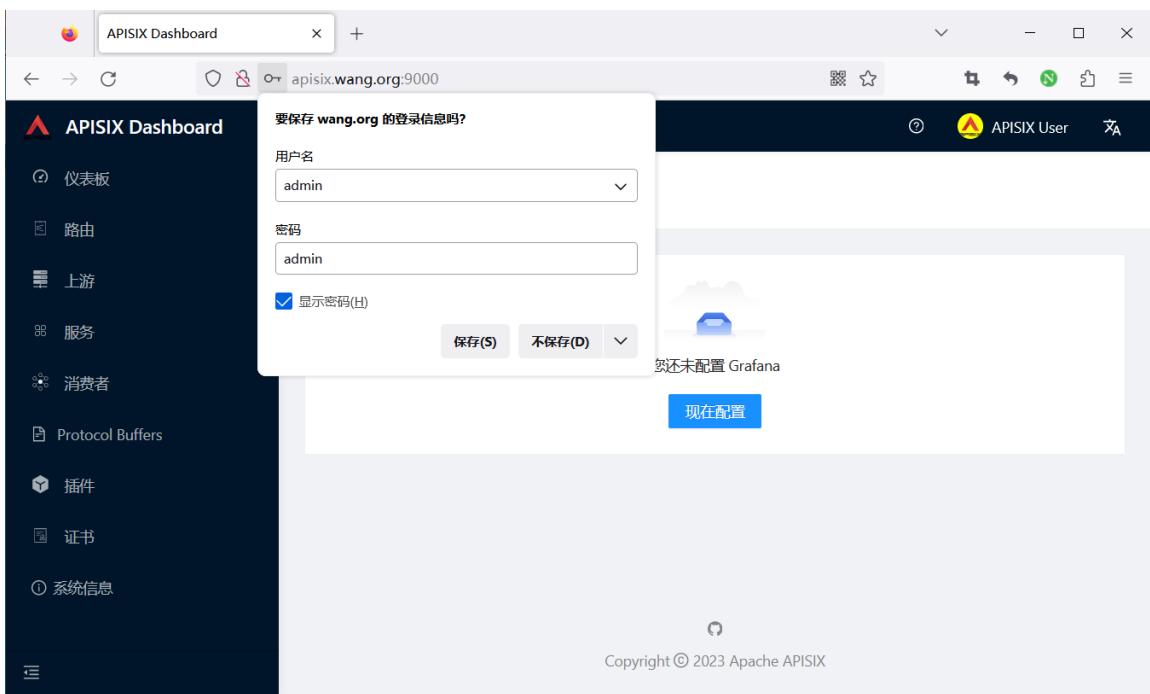
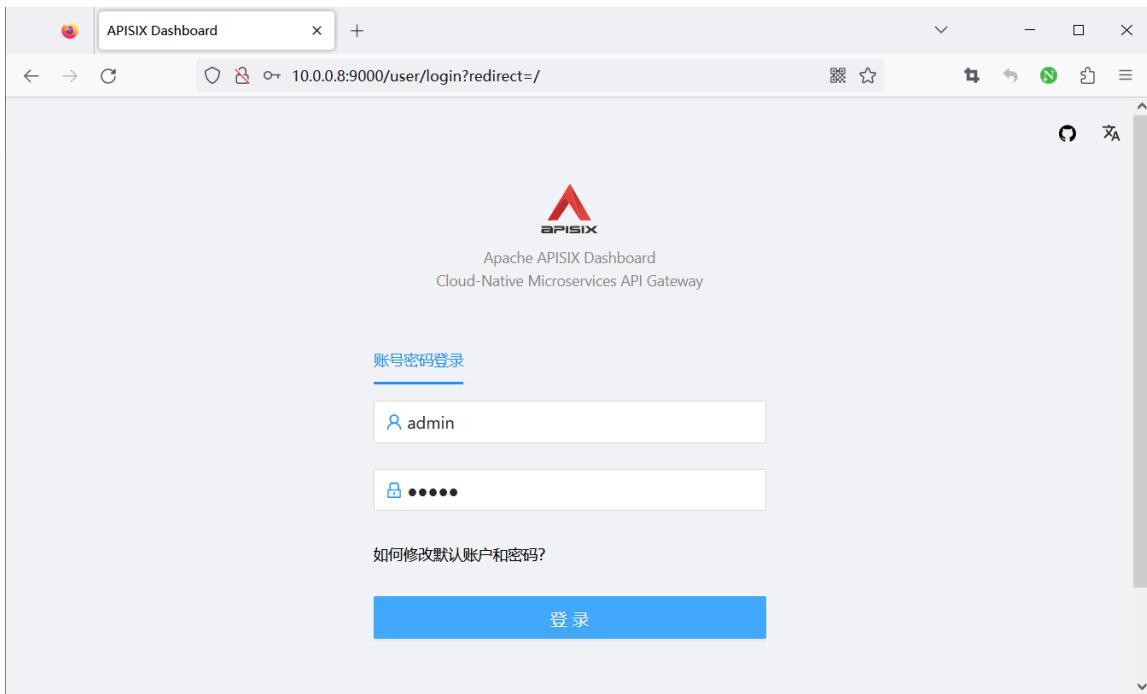
#浏览器访问:默认用户名和密码都是admin
http://apisix.wang.org:9000/
范例: 基于 quickstart 脚本安装 apisix 基础上安装 apisix dashboard
[root@ubuntu2404 ~]#git clone https://github.com/apache/apisix-docker.git
[root@ubuntu2404 ~]#cd apisix-docker/
[root@ubuntu2404 apisix-docker]#ls
all-in-one compose dashboard debian debian-dev docs example LICENSE MAINTAINING.md Makefile README.md redhat
[root@ubuntu2404 apisix-docker]#cd example/
[root@ubuntu2404 example]#ls
apisix_conf     docker-compose-arm64.yml       docker-compose.yml grafana_conf prometheus_conf
dashboard_conf docker-compose-standalone.yml etcd_conf           mkcert       upstream

[root@ubuntu2404 example]#cat dashboard_conf/conf.yaml
#
#Licensed to the Apache Software Foundation (ASF) under one or more
#contributor license agreements. See the NOTICE file distributed with
#this work for additional information regarding copyright ownership.
#The ASF licenses this file to You under the Apache License, Version 2.0
#(the "License"); you may not use this file except in compliance with
#the License.  You may obtain a copy of the License at
#
#     http://www.apache.org/licenses/LICENSE-2.0
#
#Unless required by applicable law or agreed to in writing, software
#distributed under the License is distributed on an "AS IS" BASIS,
#WITHOUT WARRANTIES OR CONDITIONS OF ANY KIND, either express or implied.
#See the License for the specific language governing permissions and
#limitations under the License.
#
conf:
  listen:
    host: 0.0.0.0     #`manager api` listening ip or host name
    port: 9000        #`manager api` listening port
  allow_list:          #If we don't set any IP list, then any IP access is allowed by default.
    - 0.0.0.0/0
  etcd:
    endpoints:         #supports defining multiple etcd host addresses for an etcd cluster
      - "http://etcd:2379"
                             #yamllint disable rule:comments-indentation
                             #etcd basic auth info
    #username: "root"   #ignore etcd username if not enable etcd auth
    #password: "123456" #ignore etcd password if not enable etcd auth
    mtls:
      key_file: ""          #Path of your self-signed client side key
      cert_file: ""         #Path of your self-signed client side cert
      ca_file: ""           #Path of your self-signed ca cert, the CA is used to sign callers' certificates
    #prefix: /apisix     #apisix config's prefix in etcd, /apisix by default
  log:
    error_log:
      level: warn       #supports levels, lower to higher: debug, info, warn, error, panic, fatal
      file_path:
        logs/error.log  #supports relative path, absolute path, standard output
                        #such as: logs/error.log, /tmp/logs/error.log, /dev/stdout, /dev/stderr
    access_log:
      file_path:
        logs/access.log  #supports relative path, absolute path, standard output
                         #such as: logs/access.log, /tmp/logs/access.log, /dev/stdout, /dev/stderr
                         #log example: 2020-12-09T16:38:09.039+0800 INFO filter/logging.go:46 /apisix/admin/routes/r1 {"status": 401, "host": "127.0.0.1:9000", "query": "asdfsafd=adf&a=a", "requestId": "3d50ecb8-758c-46d1-af5b-cd9d1c820156", "latency": 0, "remoteIP": "127.0.0.1", "method": "PUT", "errs": []}
security:
     #access_control_allow_origin: "http://httpbin.org"
     #access_control_allow_credentials: true         #support using custom cors configration
     #access_control_allow_headers: "Authorization"
     #access_control-allow_methods: "*"
     #x_frame_options: "deny"
     content_security_policy: "default-src 'self'; script-src 'self' 'unsafe-eval' 'unsafe-inline'; style-src 'self' 'unsafe-inline'; frame-src *"  #You can set frame-src to provide content for your grafana panel.
authentication:
  secret:
    secret              #secret for jwt token generation.
                        #NOTE: Highly recommended to modify this value to protect `manager api`.
                        #if it's default value, when `manager api` start, it will generate a random string to replace it.
  expire_time: 3600     #jwt token expire time, in second
  users:                #yamllint enable rule:comments-indentation
    - username: admin   #username and password for login `manager api`
      password: admin
    - username: user
      password: user

plugins:                          #plugin list (sorted in alphabetical order)
  - api-breaker
  - authz-keycloak
  - basic-auth
  - batch-requests
  - consumer-restriction
  - cors
  #- dubbo-proxy
  - echo
  #- error-log-logger
  #- example-plugin
  - fault-injection
  - grpc-transcode
  - hmac-auth
  - http-logger
  - ip-restriction
  - jwt-auth
  - kafka-logger
  - key-auth
  - limit-conn
  - limit-count
  - limit-req
  #- log-rotate
  #- node-status
  - openid-connect
  - prometheus
  - proxy-cache
  - proxy-mirror
  - proxy-rewrite
  - redirect
  - referer-restriction
  - request-id
  - request-validation
  - response-rewrite
  - serverless-post-function
  - serverless-pre-function
  #- skywalking
  - sls-logger
  - syslog
  - tcp-logger
  - udp-logger
  - uri-blocker
  - wolf-rbac
  - zipkin
  - server-info
  - traffic-split

#创建配置文件
[root@ubuntu2404 ~]#cp apisix-docker/example/dashboard_conf/conf.yaml /tmp/conf.yaml

#修改配置文件
[root@ubuntu2404 ~]#vim /tmp/conf.yaml
......
conf:
  listen:
    host: 0.0.0.0     #`manager api` listening ip or host name
    port: 9000        #`manager api` listening port
  allow_list:          #If we don't set any IP list, then any IP access is allowed by default.
    - 0.0.0.0/0
  etcd:
    endpoints:         #supports defining multiple etcd host addresses for an etcd cluster
      - "http://etcd-quickstart:2379"  #修改此行的etcd地址,此处使用2.3节的docker脚本安装,所以指定etcd服务对应容器的名称
      #- "http://127.0.0.1:2379"       #如果是2.2的二进制包安装,修改为此处配置
......

#如果APISIX是基于2.3的docker脚本安装,执行下面
[root@ubuntu2404 ~]#docker run -d --network apisix-quickstart-net --name dashboard -p 9000:9000 -v /tmp/conf.yaml:/usr/local/apisix-dashboard/conf/conf.yaml   apache/apisix-dashboard

#确认容器启动
[root@ubuntu2404 ~]#docker ps
CONTAINER ID   IMAGE                          COMMAND                  CREATED        STATUS        PORTS                                 NAMES
b9feff96bc1d   apache/apisix-dashboard        "/usr/local/apisix-d…"   7 minutes ago  Up 7 minutes  0.0.0.0:9000->9000/tcp, :::9000->9000/tcp   dashboard
20befff17ecc   apache/apisix:3.6.0-debian     "/docker-entrypoint.…"   2 hours ago    Up 2 hours    0.0.0.0:9080->9080/tcp, :::9080->9080/tcp, 0.0.0.0:9100->9100/tcp, :::9100->9100/tcp, 0.0.0.0:9180->9180/tcp, :::9180->9180/tcp, 0.0.0.0:9443->9443/tcp, :::9443->9443/tcp, 0.0.0.0:9090->9092/tcp, :::9090->9092/tcp   apisix-quickstart
c132befe013c   bitnami/etcd:3.5.7             "/opt/bitnami/script…"   2 hours ago    Up 2 hours    2379-2380/tcp                                 etcd-quickstart

#如果APISIX是是基于2.2的二进制包安装,执行下面
[root@ubuntu2404 ~]#apt update && apt -y install docker.io
[root@ubuntu2404 ~]#docker run -d --name dashboard --network host -v /tmp/conf.yaml:/usr/local/apisix-dashboard/conf/conf.yaml   apache/apisix-dashboard

#确认容器启动
[root@ubuntu2404 ~]#docker ps
CONTAINER ID   IMAME                  COMMAND                  CREATED        STATUS        PORTS     NAMES
398f521946ab   apache/apisix-dashboard   "/usr/local/apisix-d…"   2 minutes ago   Up 2 minutes             dashboard

#浏览器访问:默认用户名和密码都是admin
http://apisix.wang.org:9000/
1.2.2 RPM 二进制包安装
官方没有提供DEB包,只提供了RPM包,即只支持红帽系统的安装包
https://apisix.apache.org/zh/docs/dashboard/install/#rpm) 注意:此方法当前只支持 CentOS 7 和 8
范例
#1. install RPM package
sudo yum install -y https://github.com/apache/apisix-dashboard/releases/download/v3.0.1/apisix-dashboard-
3.0.1-0.el7.x86_64.rpm
#run dashboard in the shell
sudo manager-api -p /usr/local/apisix/dashboard/
#or run dashboard as a service
systemctl start apisix-dashboard
#浏览器访问http://127.0.0.1:9000 默认用户名和密码都是admin
范例: 在Rocky8 安装 apisix-dashboard
#先安装ETCD和APISIX,参看2.2.1和2.2.3节
#安装
[root@rocky8 ~]#wget https://github.com/apache/apisix-dashboard/releases/download/v3.0.1/apisix-dashboard-3.0.1-0.el8.x86_64.rpm
[root@rocky8 ~]#yum -y install apisix-dashboard-3.0.1-0.el8.x86_64.rpm
[root@rocky8 ~]#ls /usr/local/apisix/dashboard/
conf dag-to-lua html logs manager-api
[root@rocky8 ~]#ls /usr/local/apisix/dashboard/conf
conf.yaml customize_schema.json schema.json

#修改配置文件
[root@rocky8 ~]#cat /usr/local/apisix/dashboard/conf/conf.yaml
#
#Licensed to the Apache Software Foundation (ASF) under one or more
#contributor license agreements. See the NOTICE file distributed with
#this work for additional information regarding copyright ownership.
#The ASF licenses this file to You under the Apache License, Version 2.0
#(the "License"); you may not use this file except in compliance with
#the License.
#
#     http://www.apache.org/licenses/LICENSE-2.0
#
#Unless required by applicable law or agreed to in writing, software
#distributed under the License is distributed on an "AS IS" BASIS,
#WITHOUT WARRANTIES OR CONDITIONS OF ANY KIND, either express or implied.
#See the License for the specific language governing permissions and
#limitations under the License.
#
#yamllint disable rule:comments-indentation
conf:
  listen:
    #host: 127.0.0.1     #the address on which the `Manager API` should listen.
                          #The default value is 0.0.0.0, if want to specify, please enable it.
                          #This value accepts IPv4, IPv6, and hostname.
    port: 9000            #The port on which the `Manager API` should listen.
  #ssl:
  #  host: 127.0.0.1     #the address on which the `Manager API` should listen for HTTPS.
                          #The default value is 0.0.0.0, if want to specify, please enable it.
  #  port: 9001           #The port on which the `Manager API` should listen for HTTPS.
  #  cert: "/tmp/cert/example.crt" #Path of your SSL cert.
  #  key: "/tmp/cert/example.key" #Path of your SSL key.
  allow_list:             #If we don't set any IP list, then any IP access is allowed by default.
    - 0.0.0.0/0           #修改此行,默认只允许本机访问
    - 127.0.0.1           #The rules are checked in sequence until the first match is found.
    - ::1                 #In this example, access is allowed only for IPv4 network 127.0.0.1, and for IPv6 network ::1.
                          #It also support CIDR like 192.168.1.0/24 and 2001:0db8::/32
  etcd:
    endpoints:            #supports defining multiple etcd host addresses for an etcd cluster
      - 127.0.0.1:2379

                          #yamllint disable rule:comments-indentation
                          #etcd basic auth info
    #username: "root"   #ignore etcd username if not enable etcd auth
    #password: "123456" #ignore etcd password if not enable etcd auth
    mtls:
      key_file: ""          #Path of your self-signed client side key
      cert_file: ""         #Path of your self-signed client side cert
      ca_file: ""           #Path of your self-signed ca cert, the CA is used to sign callers' certificates
    #prefix: /apisix       #apisix config's prefix in etcd, /apisix by default
  log:
    error_log:
      level: warn       #supports levels, lower to higher: debug, info, warn, error, panic, fatal
      file_path:
        logs/error.log  #supports relative path, absolute path, standard output
                        #such as: logs/error.log, /tmp/logs/error.log, /dev/stdout, /dev/stderr
                        #such as absolute path on Windows: winfile:///C:\error.log
    access_log:
      file_path:
        logs/access.log  #supports relative path, absolute path, standard output
                         #such as: logs/access.log, /tmp/logs/access.log, /dev/stdout, /dev/stderr
                         #such as absolute path on Windows: winfile:///C:\access.log
                         #log example: 2020-12-09T16:38:09.039+0800 INFO filter/logging.go:46 /apisix/admin/routes/r1 {"status": 401, "host": "127.0.0.1:9000", "query": "asdfsafd=adf&a=a", "requestId": "3d50ecb8-758c-46d1-af5b-cd9d1c820156", "latency": 0, "remoteIP": "127.0.0.1", "method": "PUT", "errs": []}
  max_cpu: 0               #supports tweaking with the number of OS threads are going to be used for parallelism. Default value: 0 [will use max number of available cpu cores considering hyperthreading (if any)]. If the value is negative, is will not touch the existing parallelism profile.
  #security:
  #  access_control_allow_origin: "http://httpbin.org"
  #  access_control_allow_credentials: true         #support using custom cors configration
  #  access_control_allow_headers: "Authorization"
  #  access_control-allow_methods: "*"
  #  x_frame_options: "deny"
  #  content_security_policy: "default-src 'self'; script-src 'self' 'unsafe-eval' 'unsafe-inline'; style-src 'self' 'unsafe-inline'; img-src 'self' data:; frame-src xx.xx.xx.xx:3000" #You can set frame-src to provide content for your grafana panel.
authentication:
  secret:
    secret              #secret for jwt token generation.
                        #NOTE: Highly recommended to modify this value to protect `manager api`.
                        #if it's default value, when `manager api` start, it will generate a random string to replace it.
  expire_time: 3600     #jwt token expire time, in second
  users:                #yamllint enable rule:comments-indentation
    - username: admin   #username and password for login `manager api`
      password: admin
    - username: user
      password: user
oidc:
  enabled: false
  expire_time: 3600
  client_id: dashboard
  client_secret: dashboard
  auth_url: http://172.17.0.1:8080/auth/realms/master/protocol/openid-connect/auth
  token_url: http://172.17.0.1:8080/auth/realms/master/protocol/openid-connect/token
  user_info_url: http://172.17.0.1:8080/auth/realms/master/protocol/openid-connect/userinfo
  redirect_url: http://127.0.0.1:9000/apisix/admin/oidc/callback
  scope: openid
plugins:
  - api-breaker
  - authz-casbin
  - authz-casdoor
  - authz-keycloak
  - aws-lambda
  - azure-functions
  - basic-auth
  #- batch-requests
  - clickhouse-logger
  - client-control
  - consumer-restriction
  - cors
  - csrf
  - datadog
  #- dubbo-proxy
  - echo
  - error-log-logger
  #- example-plugin
  - ext-plugin-post-req
  - ext-plugin-post-resp
  - ext-plugin-pre-req
  - fault-injection
  - file-logger
  - forward-auth
  - google-cloud-logging
  - grpc-transcode
  - grpc-web
  - gzip
  - hmac-auth
  - http-logger
  - ip-restriction
  - jwt-auth
  - kafka-logger
  - kafka-proxy
  - key-auth
  - ldap-auth
  - limit-conn
  - limit-count
  - limit-req
  - loggly
  #- log-rotate
  - mocking
  #- node-status
  - opa
  - openid-connect
  - opentelemetry
  - openwhisk
  - prometheus
  - proxy-cache
  - proxy-control
  - proxy-mirror
  - proxy-rewrite
  - public-api
  - real-ip
  - redirect
  - referer-restriction
  - request-id
  - request-validation
  - response-rewrite
  - rocketmq-logger
  - server-info
  - serverless-post-function
  - serverless-pre-function
  - skywalking
  - skywalking-logger
  - sls-logger
  - splunk-hec-logging
  - syslog
  - tcp-logger
  - traffic-split
  - ua-restriction
  - udp-logger
  - uri-blocker
  - wolf-rbac
  - zipkin
  - elasticsearch-logge
  - openfunction
  - tencent-cloud-cls
  - ai
  - cas-auth

[root@rocky8 ~]#systemctl status apisix-dashboard.service
● apisix-dashboard.service - apisix-dashboard
   Loaded: loaded (/usr/lib/systemd/system/apisix-dashboard.service; static; vendor preset: disabled)
   Active: active (running) since Tue 2023-11-07 13:54:09 CST; 5s ago
 Main PID: 2032 (manager-api)
   Tasks: 7 (limit: 11175)
   Memory: 15.0M
   CGroup: /system.slice/apisix-dashboard.service
           └─2032 /usr/local/apisix/dashboard/manager-api -c /usr/local/apisix/dashboard/conf/conf.yaml

Nov 07 13:54:09 rocky8.wang.org systemd[1]: apisix-dashboard.service: Dependency Conflicts=apisix-dashboard.service dropped
Nov 07 13:54:09 rocky8.wang.org systemd[1]: Started apisix-dashboard.
Nov 07 13:54:09 rocky8.wang.org manager-api[2032]: The manager-api is running successfully!
Nov 07 13:54:09 rocky8.wang.org manager-api[2032]: Version : 3.0.1
Nov 07 13:54:09 rocky8.wang.org manager-api[2032]: GitHash : 397c0cb
Nov 07 13:54:09 rocky8.wang.org manager-api[2032]: Config File: /usr/local/apisix/dashboard/conf/conf.yaml
Nov 07 13:54:09 rocky8.wang.org manager-api[2032]: Listen : 0.0.0.0:9000
Nov 07 13:54:09 rocky8.wang.org manager-api[2032]: Loglevel: warn
Nov 07 13:54:09 rocky8.wang.org manager-api[2032]: ErrorLogFile: /usr/local/apisix/dashboard/logs/error.log
Nov 07 13:54:09 rocky8.wang.org manager-api[2032]: AccessLogFile: /usr/local/apisix/dashboard/logs/access.log

[root@rocky8 ~]#ss -ntlp|grep api
LISTEN 0      128                *:9000             *:*    users:(("manager-api",pid=2032,fd=10))
1.2.3 源码编译安装
The Dashboard project contains both manager-api and web , but web is optional.
The manager-api and web will be included in this build guide product.
1.2.3.1 Prerequisites
https://apisix.apache.org/zh/docs/dashboard/install/#source-prerequisites Before using source codes to build, make sure that the following dependencies are installed in your environment.
For manager-api :
Golang 1.16+
Tip: For users in mainland China, you can use the following command to speed up the module downloads.
$ go env -w GOPROXY=https://goproxy.cn, direct
For web :
- Node.js current LTS (14.x+)
- Yarn
1.2.3.2 Download
https://apisix.apache.org/zh/docs/dashboard/install/#source-download

git clone -b release/3.0 https://github.com/apache/apisix-database.git && cd apisix-database
1.2.3.3 Build
https://apisix.apache.org/zh/docs/dashboard/install/#source-build

cd apisix-database
make build
When the build is complete, the results are stored in the root output directory.
Note: make build will build manager-api and web , use the make help command to see more commands.
1.2.3.4 Launch
https://apisix.apache.org/zh/docs/dashboard/install/#source-launch After the build is complete and before you start, make sure the following dependencies are installed and running in your environment.
etcd 3.4.0+
Check and modify the configuration information in output/conf/conf.yaml according to your deployment environment.
Launch the Dashboard
cd ./output
./manager-api
Without changing the configuration, visit http://127.0.0.1:9000 to use the dashboard with GUI, where the default username and password are admin .
1.2.3.5 Service
https://apisix.apache.org/zh/docs/dashboard/install/#source-service You will need to handle your own service management when deploying using the source code compilation method. We provide a service file template for operating systems that use the Systemd service manager.
Install
mkdir -p /usr/local/apisix-database
cp -rf ./output/* /usr/local/apisix-database

Create service unit

Copy the following or use this file directly, you need to copy it to the /usr/lib/systemd/system directory and execute the systemctl daemon-reload command.

copy service unit

cp ./api/service/apisix-database.service /usr/lib/systemd/system/apisix-database.service
systemctl daemon-reload
or: If you need to modify the service unit, you can use the following command
echo "[unit]
Description=apisix-database
Conflicts=apisix-database.service
After=network-online.target
[Service]
WorkingDirectory=/usr/local/apisix-database
ExecStart=/usr/local/apisix-database/manager-api -c /usr/local/apisix-database/conf/conf.yaml" > /usr/lib/systemd/system/apisix-database.service
Manage service
You can use the following command to manage the service.
start apisix-database - systemctl start apisix-database - stop apisix-database - systemctl stop apisix-database - check apisix-database status - systemctl status apisix-database
1.2.4 APISIX-3.13.0以后版内置 Dashboard
APISIX-3.13.0以后版内置了 Dashboard
[root@ubuntu2404 ~]#curl -s "http://127.0.0.1:9080" --head | grep Server
Server: APISIX/3.13.0
[root@ubuntu2404 ~]#vim /usr/local/apisix/conf/config.yaml
deployment:
admin:
enable_admin_cors: true
admin_listen:
ip: 0.0.0.0
port: 9180
admin_key:
- key: edd1c9f034335f136f87ad84b625c8f1
role: admin
name: admin
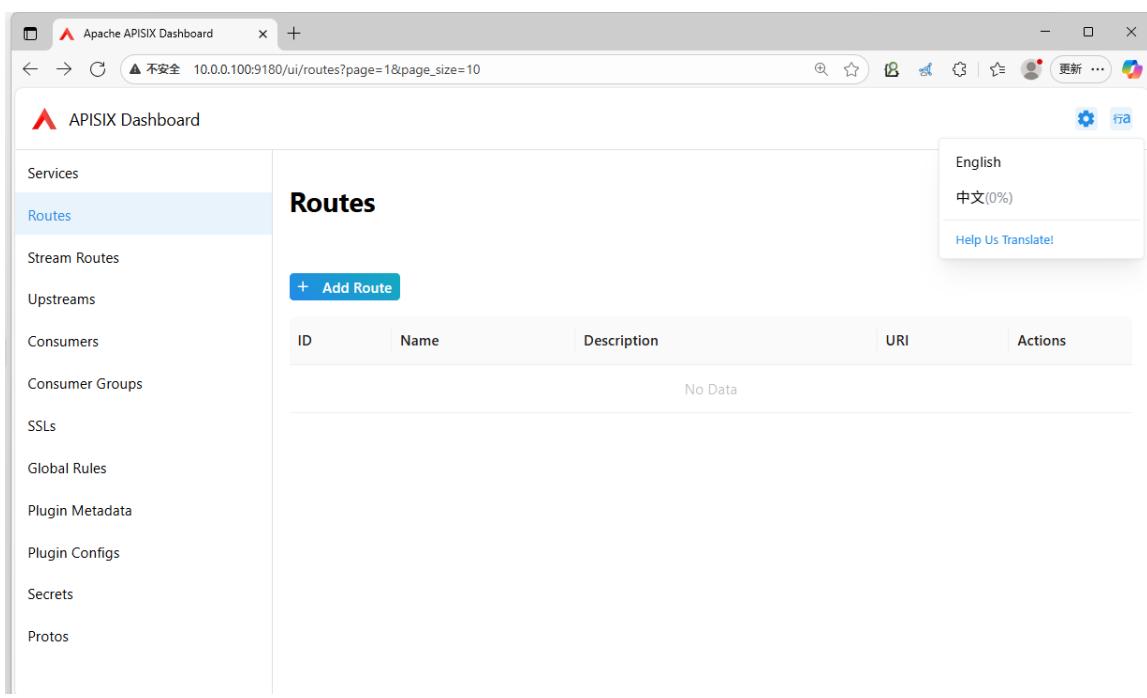
enable_admin_ui: true #默认开启UI
#访问链接
http://10.0.0.100:9180/ui/
1.3 基于APISIX Dashboard 管理路由
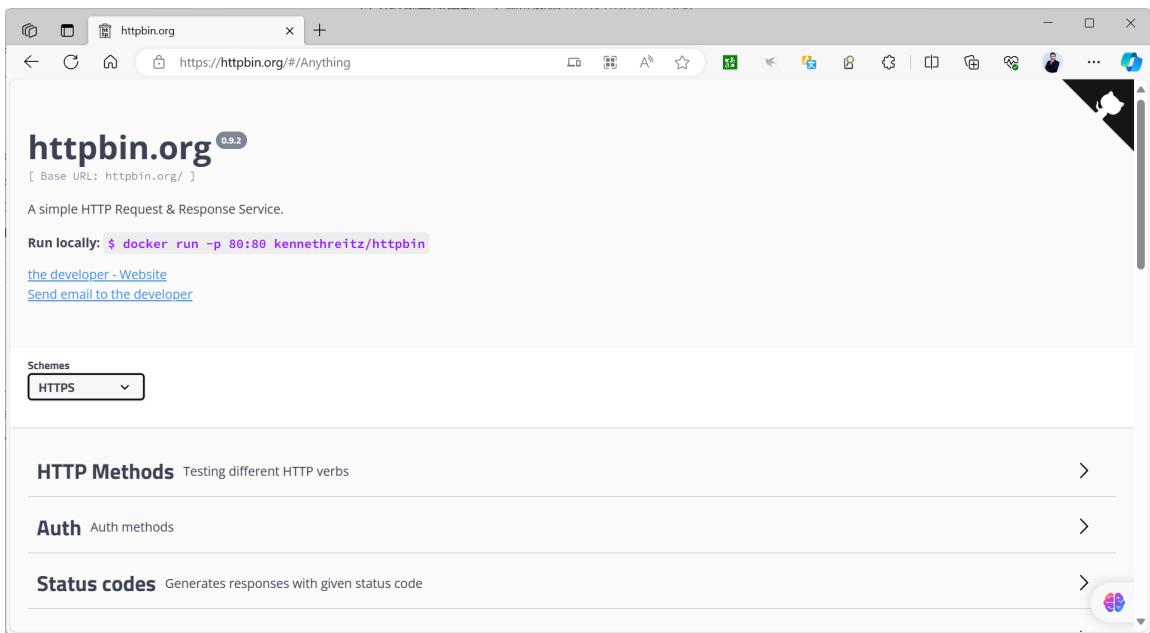
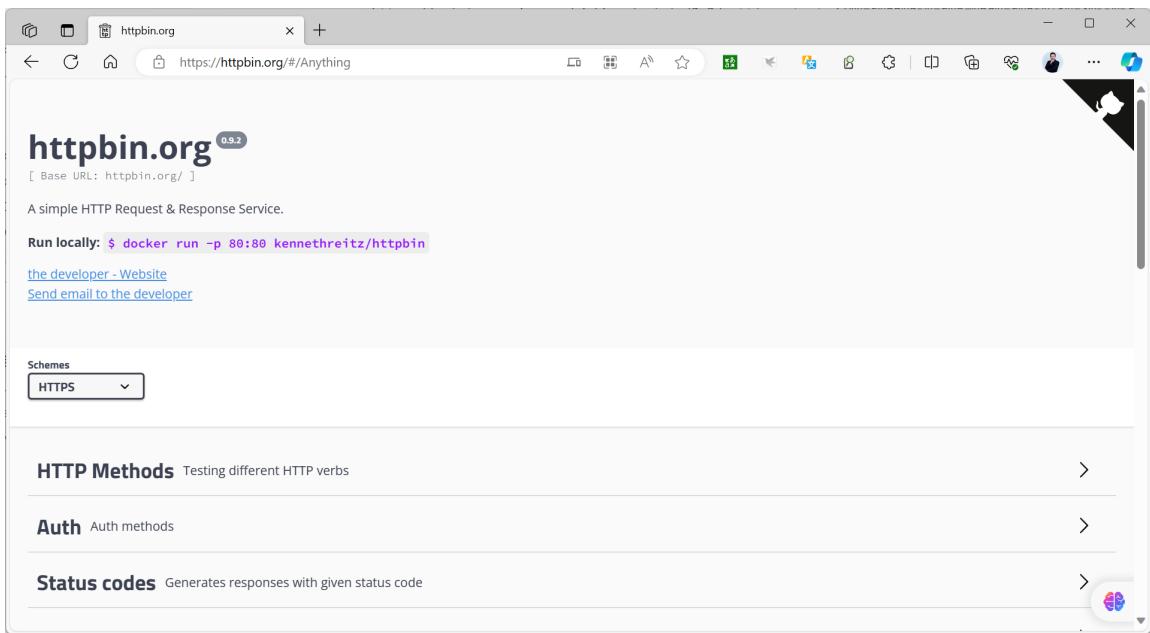
以下案例可以使用到一个测试网站 https://httpbin.org/ 和相关容器
https://httpbin.org
范例:基于httpbin.org网站测试HTTP请求访问
发起请求URL,可以观察到下面显示结果
https://httpbin.org/cookies/set/name/wang

[root@ubuntu2404 ~]#curl -X GET "https://httpbin.org/anything/class?name=wangxiaochun"
{
  "args": {
    "name": "wangxiaochun"
  },
  "data": "",
  "files": {},
  "form": {},
  "headers": {
    "Accept": "*/*",
    "Host": "httpbin.org",
    "User-Agent": "curl/8.5.0",
    "X-Amzn-Trace-Id": "Root=1-6882f752-2acdcdcd7baad83e04634a47"
  },
  "json": null,
  "method": "GET",
  "origin": "219.142.151.32",
  "url": "https://httpbin.org/anything/class?name=wangxiaochun"
}
范例:容器方式运行
[root@ubuntu2404 ~]#docker run --name httpbin -d -p 80:80 registry.cn- beijing.aliyun.com/zhangqing/httpbin:2019
[root@ubuntu2404 ~]#docker run --name httpbin -d -p 80:80 kennethreitz/httpbin
Unable to find image 'kennethreitz/httpbin:latest' locally
latest:Pulling from kennethreitz/httpbin
473ede7ed136:Pull complete
c46b5fa4d940:Pull complete
93ae3df89c92:Pull complete
6b1eed27cade:Pull complete
0373952b589d:Pull complete

7b82cd0ee527: Pull complete
a36b2d884a89: Pull complete
Digest: sha256:599fe5e5073102ddb0ee3ddb65f049dbab44fa9fc251f6835c9990f8fb196a72b
Status: Downloaded newer image for kennethreitz/httpbin:latest
[2023-12-06 03:45:33 +0000] [1] [INFO] Starting gunicorn 19.9.0
[2023-12-06 03:45:33 +0000] [1] [INFO] Listening at: http://0.0.0.0:80 (1)
[2023-12-06 03:45:33 +0000] [1] [INFO] Using worker: gevent
[2023-12-06 03:45:33 +0000] [9] [INFO] Booting worker with pid: 9
1.3.1 直接创建路由
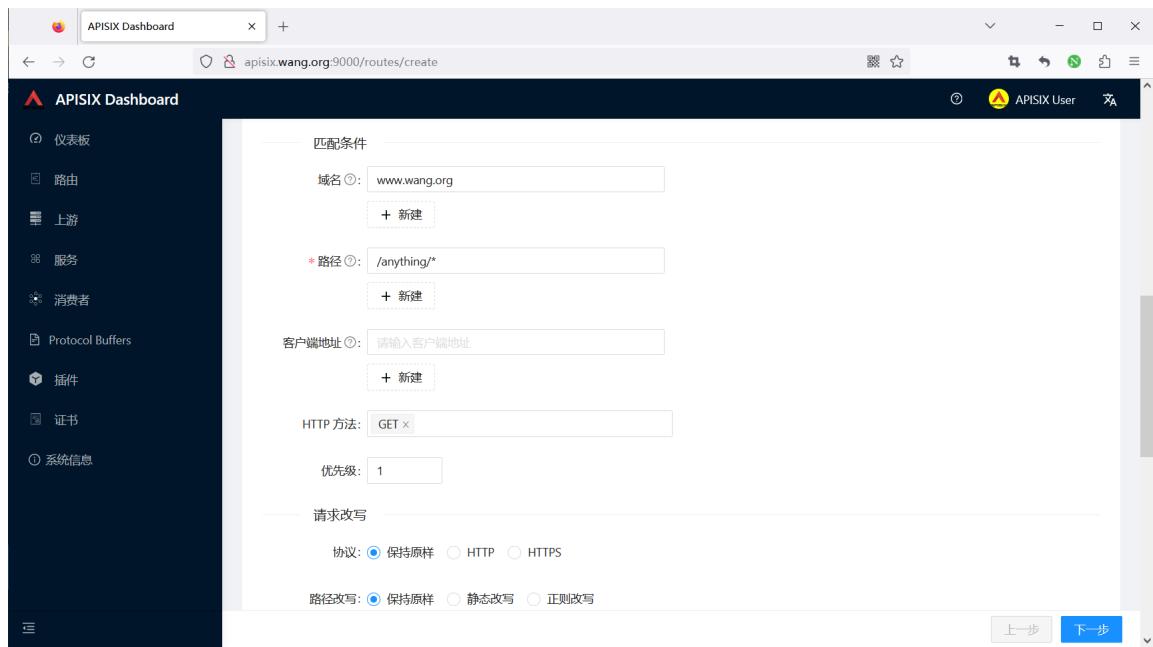

注意:先在10.0.0.100上开启服务
[root@ubuntu2404 ~]#docker run -d --name httpbin -p 80:80 registry.cnbeijing.aliyuncs.com/zhangqing/httpbin:2019

[root@ubuntu2404 ~]#docker run -d --name httpbin -p 80:80 kennethreitz/httpbin

#测试访问
[root@ubuntu2404 ~]#curl -XGET -H"host: www.wang.org" http://127.0.0.1:9080/anything/wang?name=18

{
  "args": {
    "name": "18"
  },
  "data": "",
  "files": {},
  "form": {},
  "headers": {
    "Accept": "*/*",
    "Host": "www.wang.org",
    "User-Agent": "curl/7.81.0",
    "X-Forwarded-Host": "www.wang.org"
  },
  "json": null,
  "method": "GET",
  "origin": "172.20.0.1",
  "url": "http://www.wang.org/anything/wang?name=18"
}

#在10.0.0.100上关闭服务,再访问可以看到下面显示结果
[root@ubuntu2404 ~]#curl -XGET -H"host: www.wang.org" http://127.0.0.1:9080/anything/wang?name=18
<html>
<head><title>502 Bad Gateway</title></head>
<body>
<center><h1>502 Bad Gateway</h1></center>
<hr><center>openresty</center>
<p><em>Powered by <a href="https://apisix.apache.org/">APISIX</a>.</em></p>
</body>
</html>
添加新的上游服务
#在10.0.0.101上开启服务
[root@ubuntu2404 ~]#docker run -p 80:80 kennethreitz/httpbin

再次访问,如下显示
#再次访问,如下显示
[root@ubuntu2404 ~]#curl -XGET -H"host: www.wang.org" http://127.0.0.1:9080/anything/wang?name=18
{
  "args": {
    "name": "18"
  },
  "data": "",
  "files": {},
  "form": {},
  "headers": {
    "Accept": "*/*",
    "Host": "www.wang.org",
    "User-Agent": "curl/7.81.0",
    "X-Forwarded-Host": "www.wang.org"
  },
  "json": null,
  "method": "GET",
  "origin": "172.20.0.1",
  "url": "http://www.wang.org/anything/wang?name=18"
}
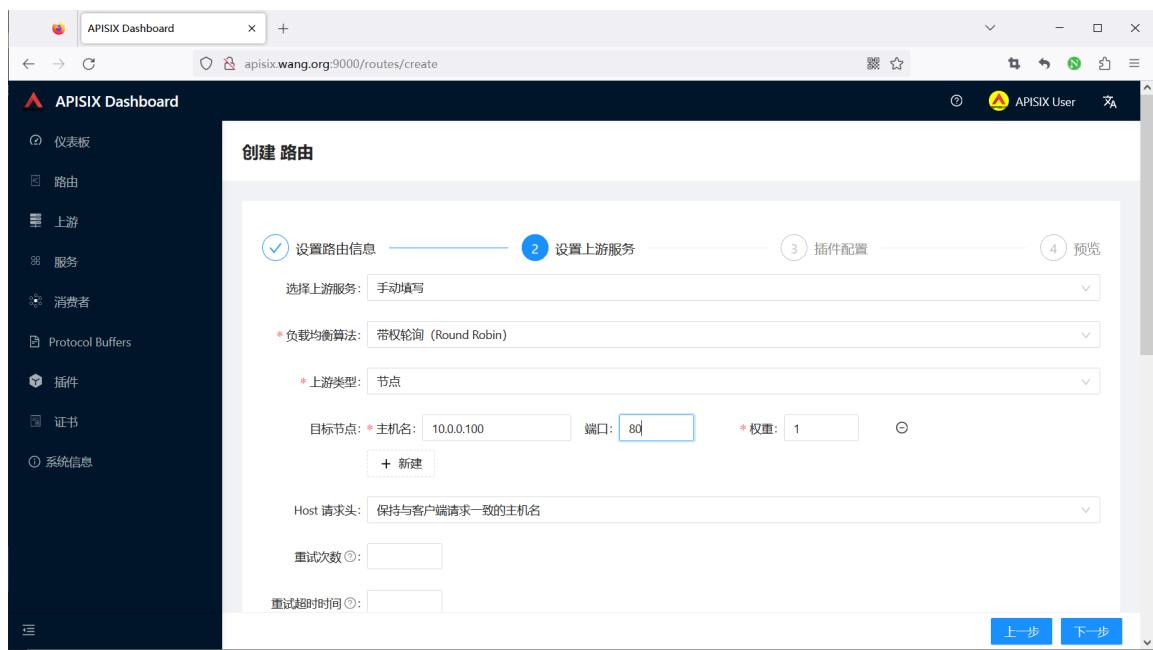
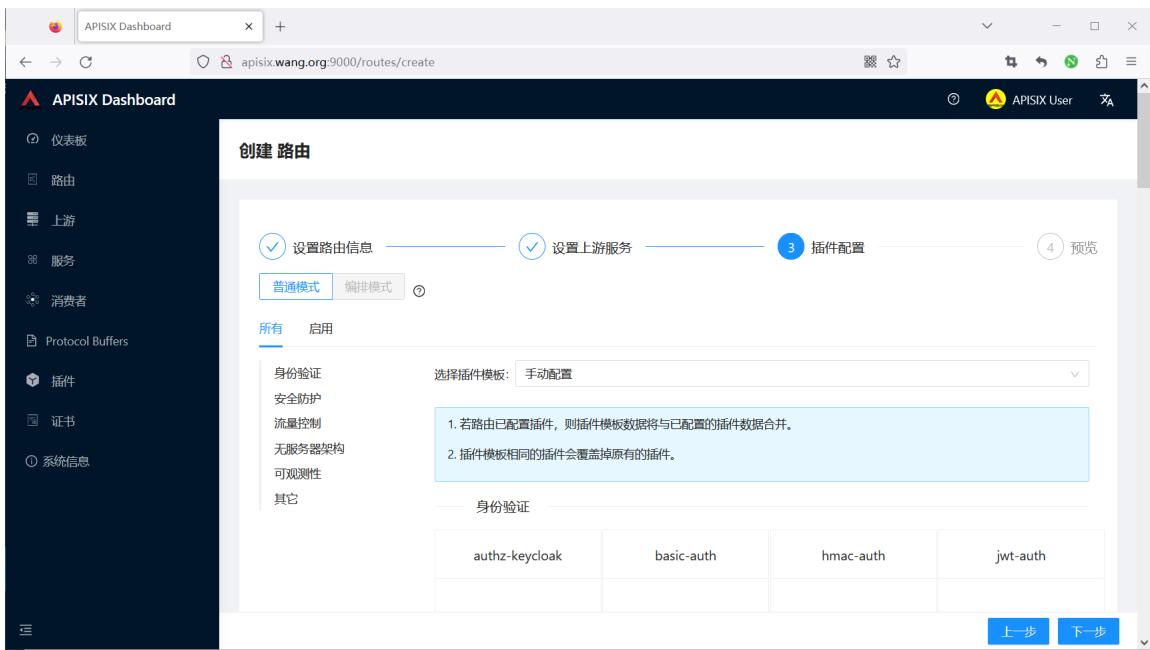
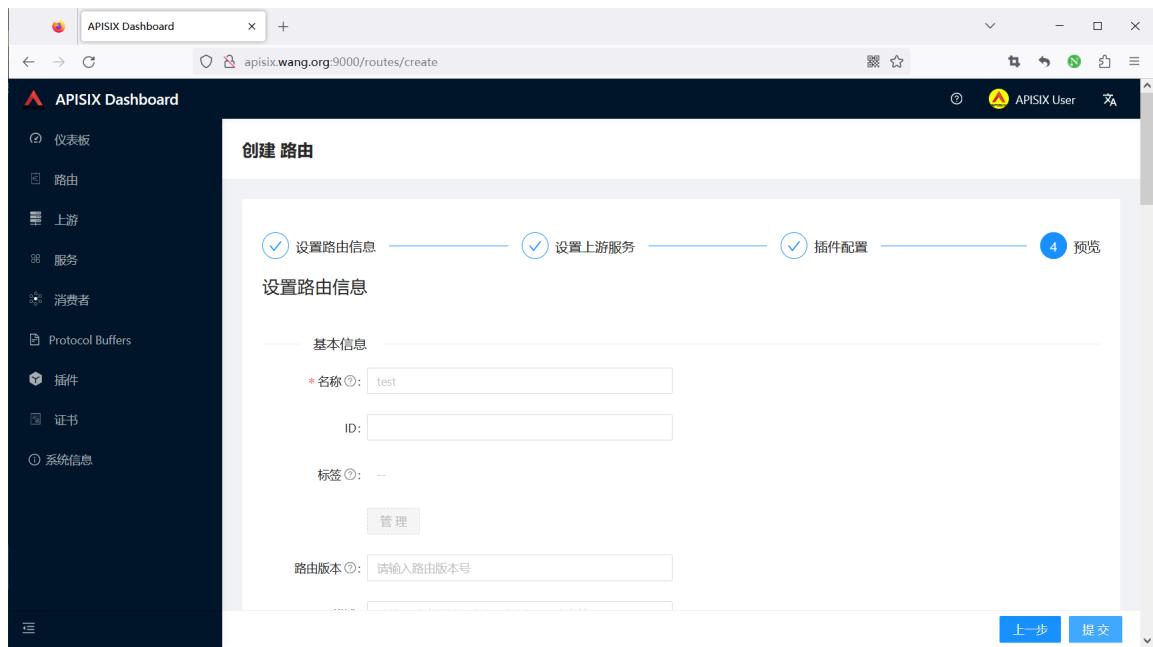
1.3.2 基于 Upstream 创建路由
1.3.2.1 创建上游 Upstream


1.3.2.2 创建路由 Route

直接选择前面创建的upstream

只要后台upstream主机开启服务,就可以看到下面显示
#只要后台upstream主机开启服务,就可以看到下面显示
[root@ubuntu2404 ~]#curl -XGET -H"host: www.wang.org" http://127.0.0.1:9080/anything/wang?name=18
{
  "args": {
    "name": "18"
  },
  "data": "",
  "files": {},
  "form": {},
  "headers": {
    "Accept": "*/*",
    "Host": "www.wang.org",
    "User-Agent": "curl/7.81.0",
    "X-Forwarded-Host": "www.wang.org"
  },
  "json": null,
  "method": "GET",
  "origin": "172.20.0.1",
  "url": "http://www.wang.org/anything/wang?name=18"
}

#停止后面所有服务,再访问可看到下面提示
[root@ubuntu2404 ~]#curl -XGET -H"host: www.wang.org" http://127.0.0.1:9080/anything/wang?name=18
<html>
<head><title>502 Bad Gateway</title></head>
<body>
<center><h1>502 Bad Gateway</h1></center>
<hr><center>openresty</center>
<p><em>Powered by <a href="https://apisix.apache.org/">APISIX</a>.</em></p>
</body>
</html>

#测试错误的路由
[root@ubuntu2404 ~]#curl -XGET -H"host: www.wang.com" http://127.0.0.1:9080/anything/wang?name=18
{"error_msg":"404 Route Not Found"}

[root@ubuntu2404 ~]#curl -XGET -H"host: www.wang.org" http://127.0.0.1:9080
{"error_msg":"404 Route Not Found"}

[root@ubuntu2404 ~]#curl -XGET -H"host: www.wang.org" http://127.0.0.1:9080/anything
{"error_msg":"404 Route Not Found"}
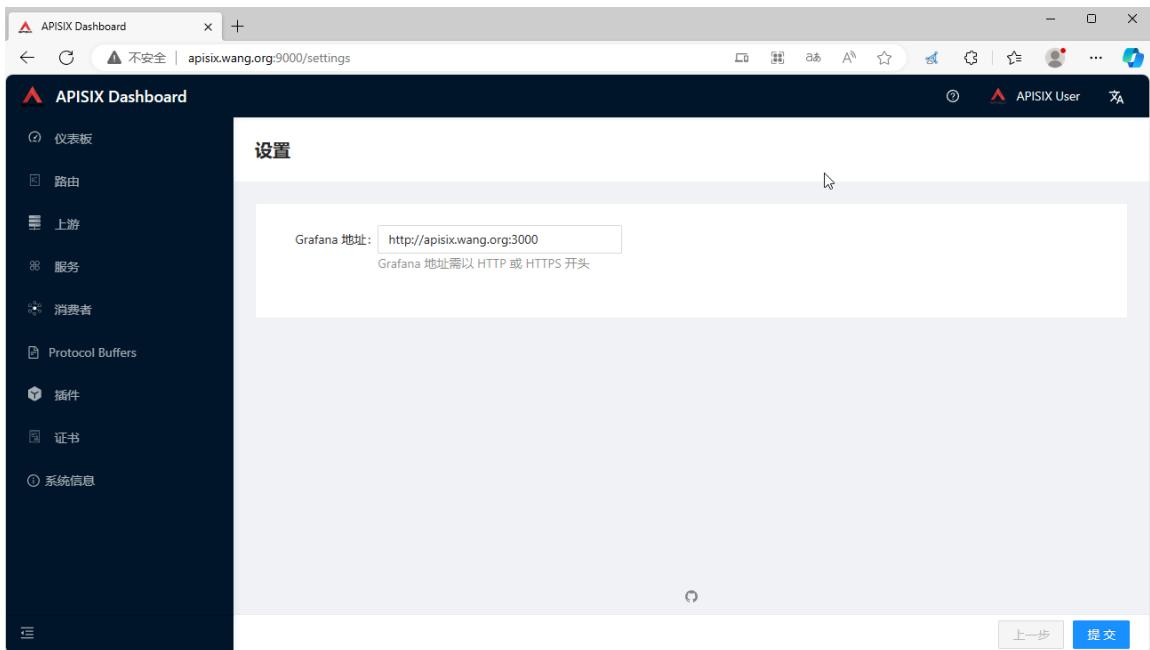
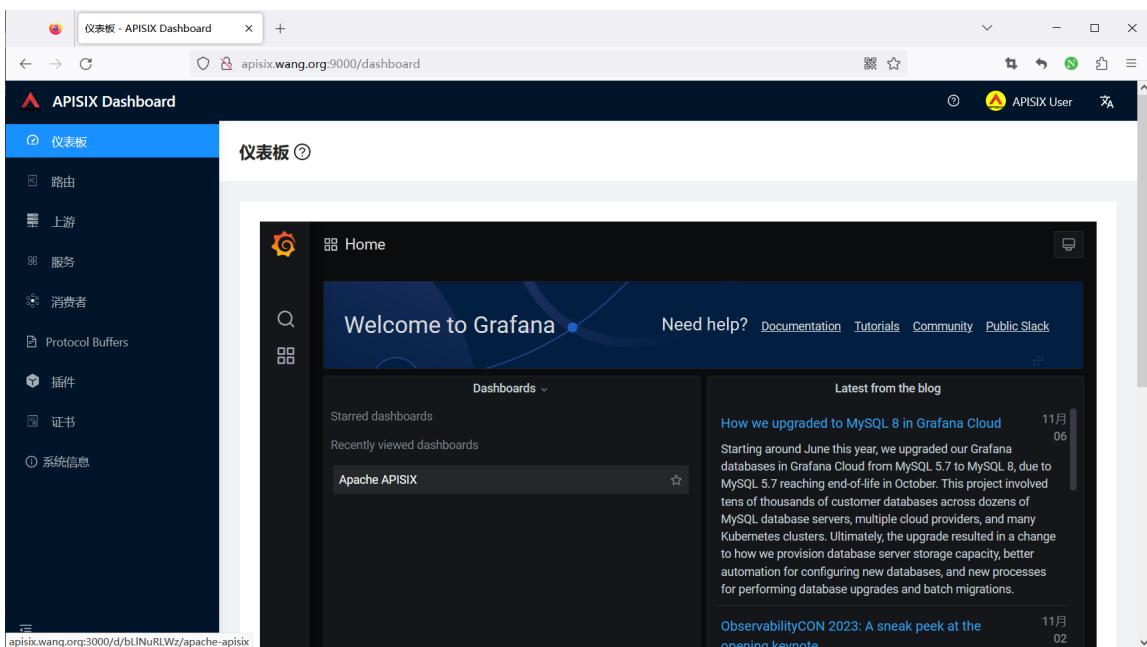
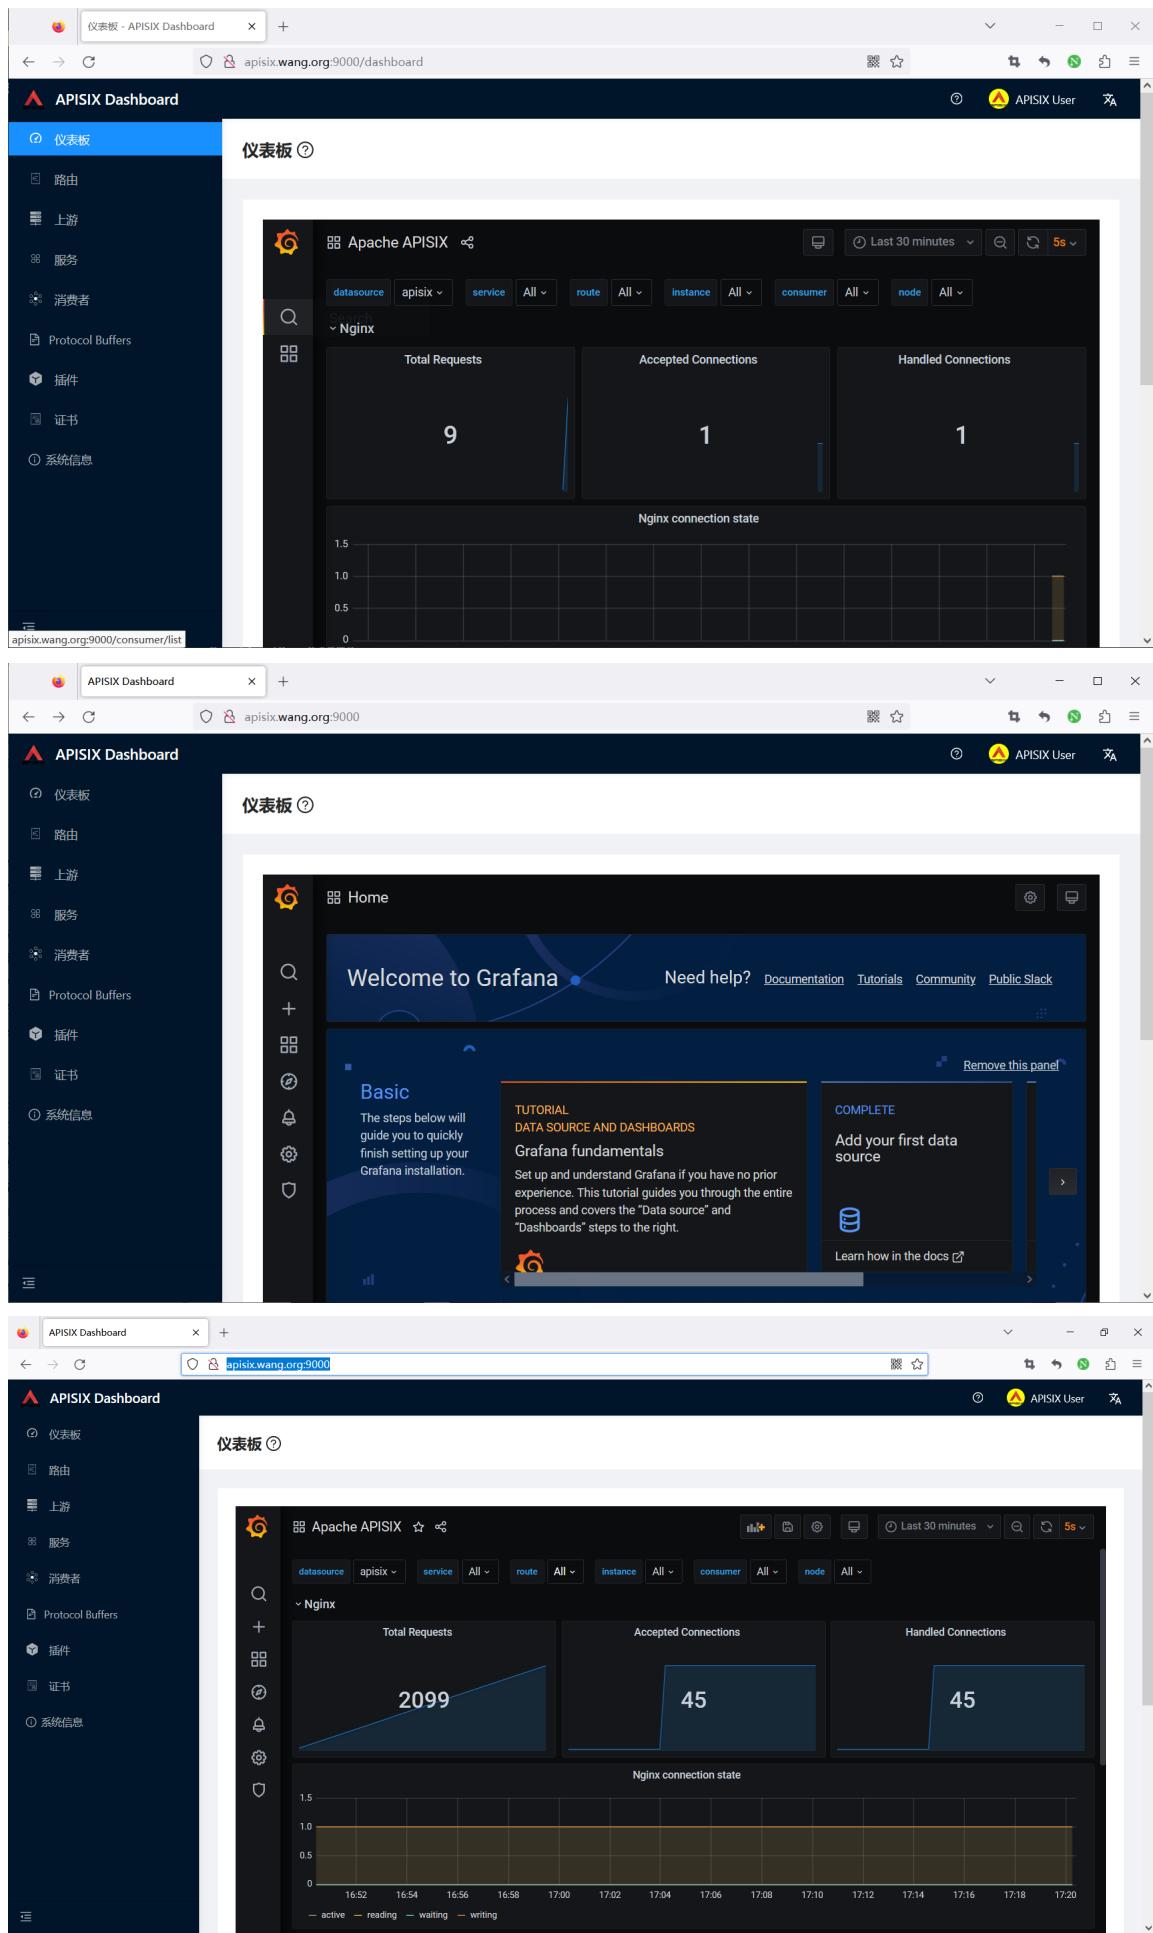
1.4 Grafana 展示
通过 docker-compose 安装内置 grafana展示
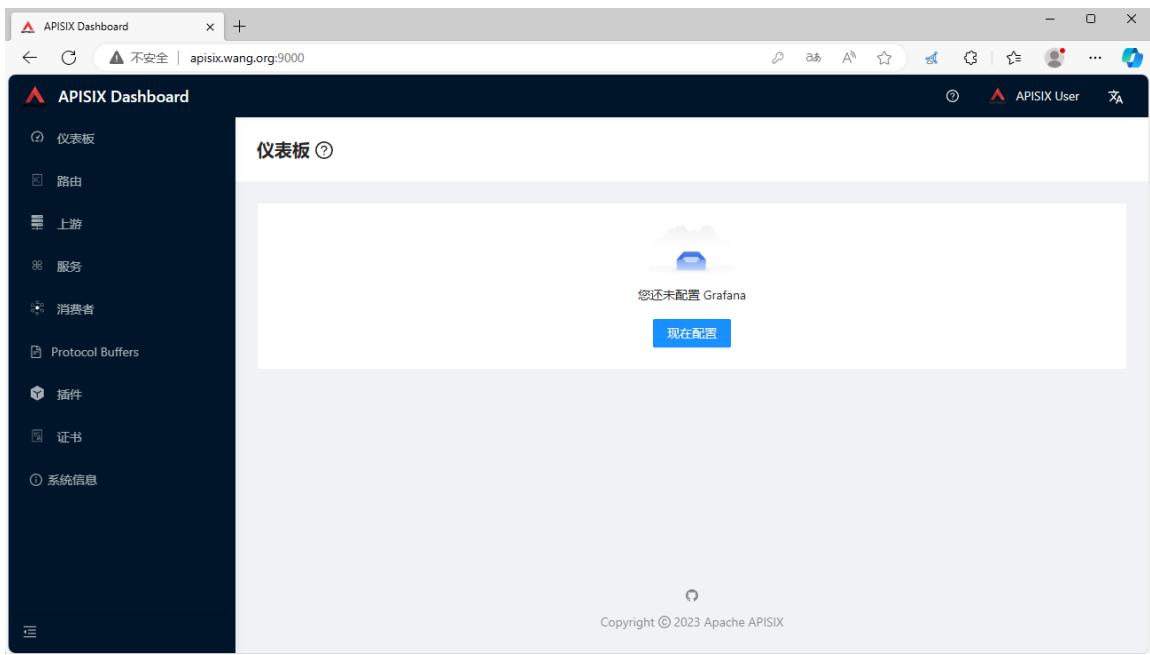
输入本机的IP,注意:不支持127.0.0.1
二、APISIX API 访问
https://apisix.apache.org/zh/docs/apisix/admin-api
2.1 API 访问说明
https://apisix.apache.org/zh/docs/apisix/3.2/getting-started/#%E5%89%8D%E6%8F%90%E6%9D%A1%E4%BB%B6
APISIX 通过端口9180/TCP提供API访问
在开始使用 APISIX 之前,请确保你已经安装以下应用:
- Docker 和 Docker Compose。
- curl 用于测试 API。你也可以使用 Hoppscotch 之类的工具。
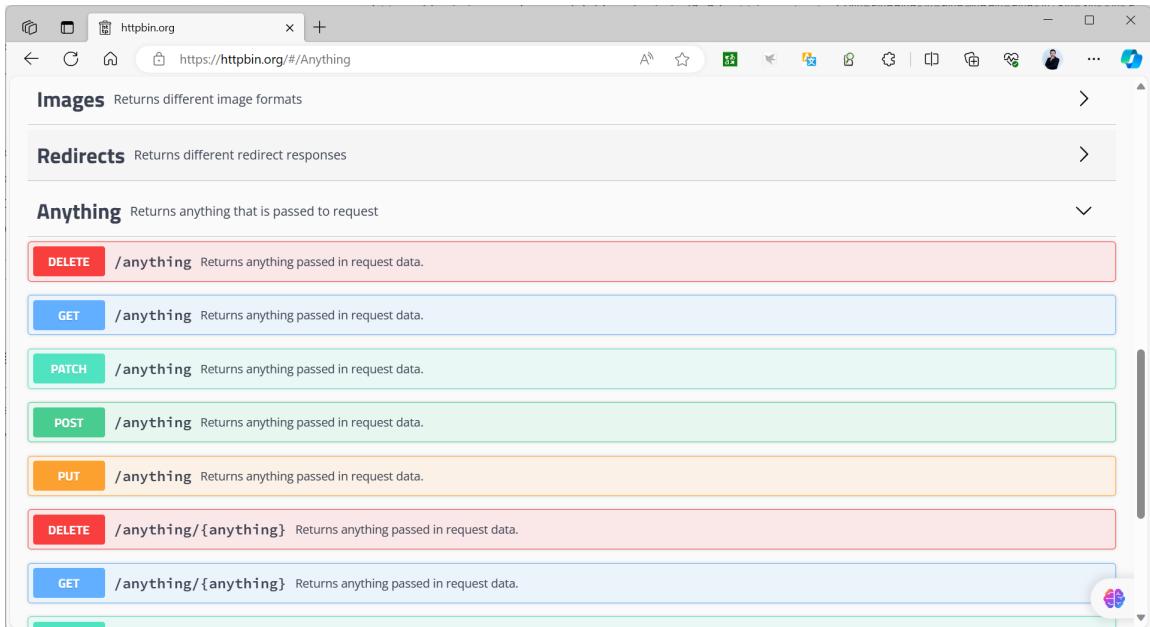
- 下面会使用的上游服务是 httpbin.org,你可以使用它进行测试。这是一个返回服务,它将返回我们在请求中传递的参数。
关于 httpbin.org 说明
A simple HTTP Request & Response Service.
https://httpbin.org/
请求内容:
请求 URL 由以下参数构成:
- Protocol:即网络传输协议,在示例中,我们使用的是 HTTP 协议。
- Port:即端口,示例中使用的 80 端口。
- Host:即主机地址,示例中使用的是 httpbin.org
- Path:即路径,示例中的路径是 /get。
- Query Parameters:即查询字符串,这里有两个字符串,分别是 foo1 和 foo2 。
环境准备
- httpbin.org 测试网站
准备一个测试容器, docker run -p 80:80 kennethreitz/httpbin
范例: 测试访问 httpbin.org 网站
[root@ubuntu2404 ~]#curl --location --request GET "http://httpbin.org/get?foo1=bar1&foo2=bar2"
{
  "args": {
    "foo1": "bar1",
    "foo2": "bar2"
 },
  "headers": {
    "Accept": "*/*",
    "Host": "httpbin.org",
    "User-Agent": "curl/7.81.0",
    "X-Amzn-Trace-Id": "Root=1-6549e617-04677a9d31de10326f61686d"
 },
  "origin": "1.203.173.227",
  "url": "http://httpbin.org/get?foo1=bar1&foo2=bar2"
}
范例: 部署 kennethreitz/httpbin 测试Docker容器
[root@ubuntu2404 ~]#docker run --name httpbin -d -p 80:80 registry.cnbeijing.aliyuncs.com/wangxiaochun/httpbin:2019
[root@ubuntu2404 ~]#docker run --name httpbin -d -p 80:80 kennethreitz/httpbin
Unable to find image 'kennethreitz/httpbin:latest' locally
latest: Pulling from kennethreitz/httpbin
473ede7ed136: Pull complete
c46b5fa4d940: Pull complete
93ae3df89c92: Pull complete
6b1eed27cade: Pull complete
0373952b589d: Pull complete
7b82cd0ee527: Pull complete
a36b2d884a89: Pull complete
Digest: sha256:599fe5e5073102dbb0ee3dbb65f049dab44fa9fc251f6835c9990f8fb196a72b
Status: Downloaded newer image for kennethreitz/httpbin:latest
[2023-11-07 08:22:39 +0000] [1] [INFO] Starting gunicorn 19.9.0
[2023-11-07 08:22:39 +0000] [1] [INFO] Listening at: http://0.0.0.0:80 (1)
[2023-11-07 08:22:39 +0000] [1] [INFO] Using worker: gevent
[2023-11-07 08:22:39 +0000] [8] [INFO] Booting worker with pid: 8
[root@ubuntu2404 ~]#curl http://127.0.0.1/anything/foo?age=18
{
  "args": {
    "age": "18"
 },
  "data": "",
  "files": {},
  "form": {},
  "headers": {
    "Accept": "*/*",
    "Host": "127.0.0.1",
    "User-Agent": "curl/7.81.0"
 },
  "json": null,
  "method": "GET",
  "origin": "172.17.0.1",
  "url": "http://127.0.0.1/anything/foo?age=18"
}
范例: 查看服务
[root@ubuntu2404 ~]#curl "http://127.0.0.1:9180/apisix/admin/services" -H "X-API-KEY:
edd1c9f034335f136f87ad84b625c8f1"
{"list":[],"total":0}
[root@ubuntu2404 ~]#curl -I "http://127.0.0.1:9180/apisix/admin/services" -H "X-API-KEY:
edd1c9f034335f136f87ad84b625c8f1"
HTTP/1.1 404 Not Found
Date: Tue, 26 Sep 2023 08:20:25 GMT
Content-Type: text/html; charset=utf-8
Content-Length: 225
Connection: keep-alive
Server: APISIX/3.5.0
Access-Control-Allow-Origin: *
Access-Control-Allow-Credentials: true
Access-Control-Expose-Headers: *
Access-Control-Max-Age: 3600
#说明:edd1c9f034335f136f87ad84b625c8f1是config.yml文件的key的值
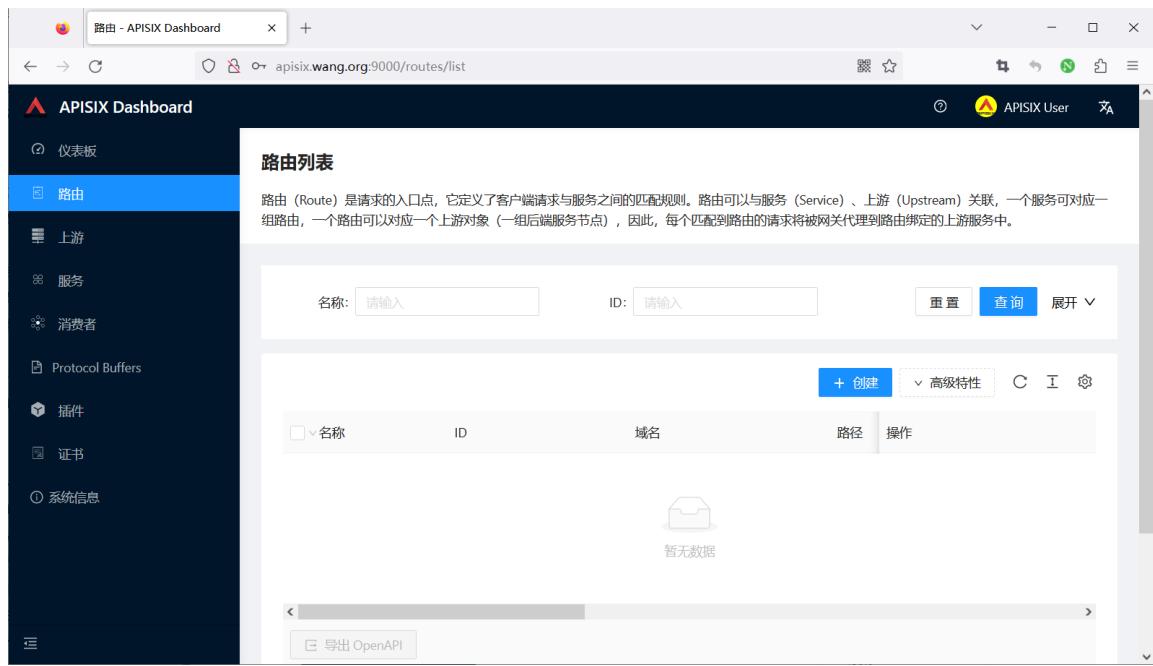
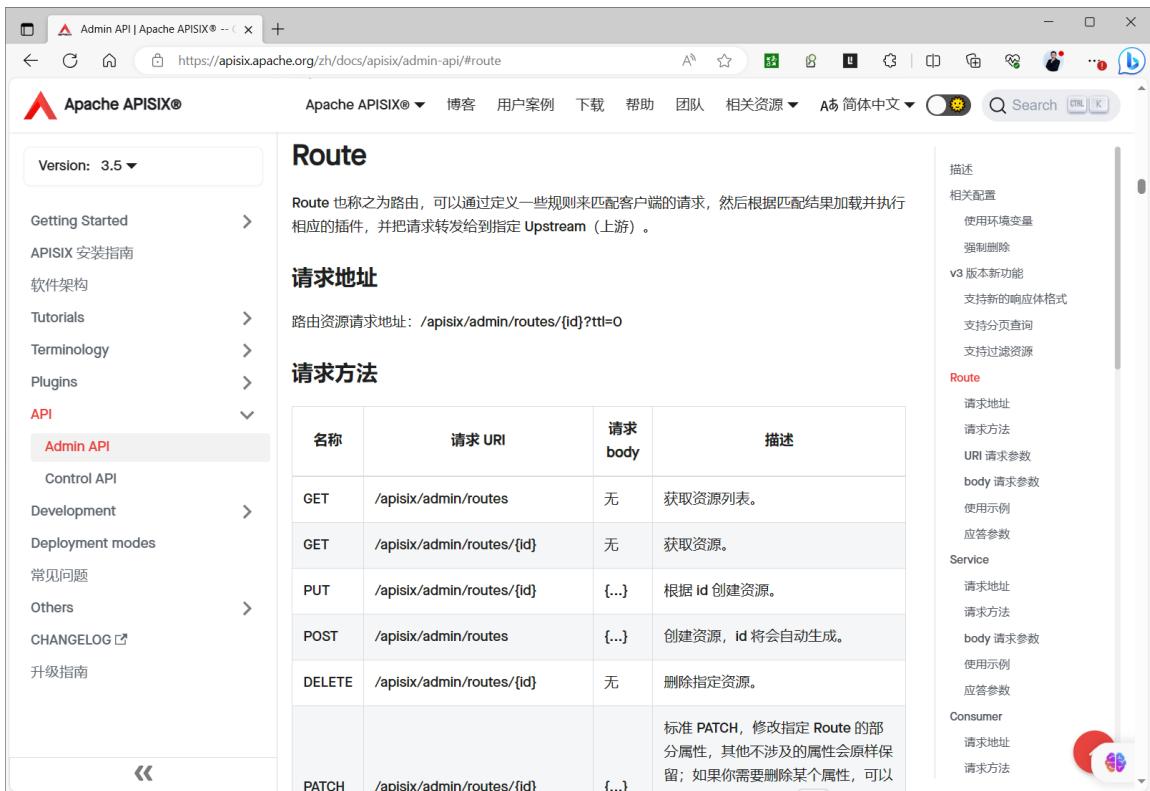
2.2 管理路由 Route
路由(Route)是请求的入口点,它定义了客户端请求与服务之间的匹配规则。
路由可以与服务(Service)、上游(Upstream)关联,一个服务可对应一组路由,一个路由可以对应一个上游对象(一组后端服务节点),因此,每个匹配到路由的请求将被网关代理到路由绑定的上游服务中。
https://apisix.apache.org/zh/docs/apisix/admin-api/#route
#Route 对象 JSON 配置示例:
{
    "id": "1",                            #id,非必填
    "uris": ["/a","/b"],                  #一组 URL 路径
    "methods": ["GET","POST"],            #可以填多个方法
    "hosts": ["a.com","b.com"],           #一组 host 域名
    "plugins": {},                        #指定 route 绑定的插件
    "priority": 0,                        #apisix 支持多种匹配方式,可能会在一次匹配中同时匹配到多条路由,此时优先级高的优
先匹配中
    "name": "路由 xxx",
    "desc": "hello world",
    "remote_addrs": ["127.0.0.1"],        #一组客户端请求 IP 地址
    "vars": [["http_user", "==", "ios"]], #由一个或多个 [var, operator, val] 元素组成的列表
    "upstream_id": "1",                   #upstream 对象在 etcd 中的 id ,建议使用此值
    "upstream": {},                       #upstream 信息对象,建议尽量不要使用
    "timeout": {                          #为 route 设置 upstream 的连接、发送消息、接收消息的超时时间。
        "connect": 3,
        "send": 3,
        "read": 3
   },
    "filter_func": ""                     #用户自定义的过滤函数,非必填
}
官方使用示例
https://apisix.apache.org/zh/docs/apisix/admin-api/#route-example
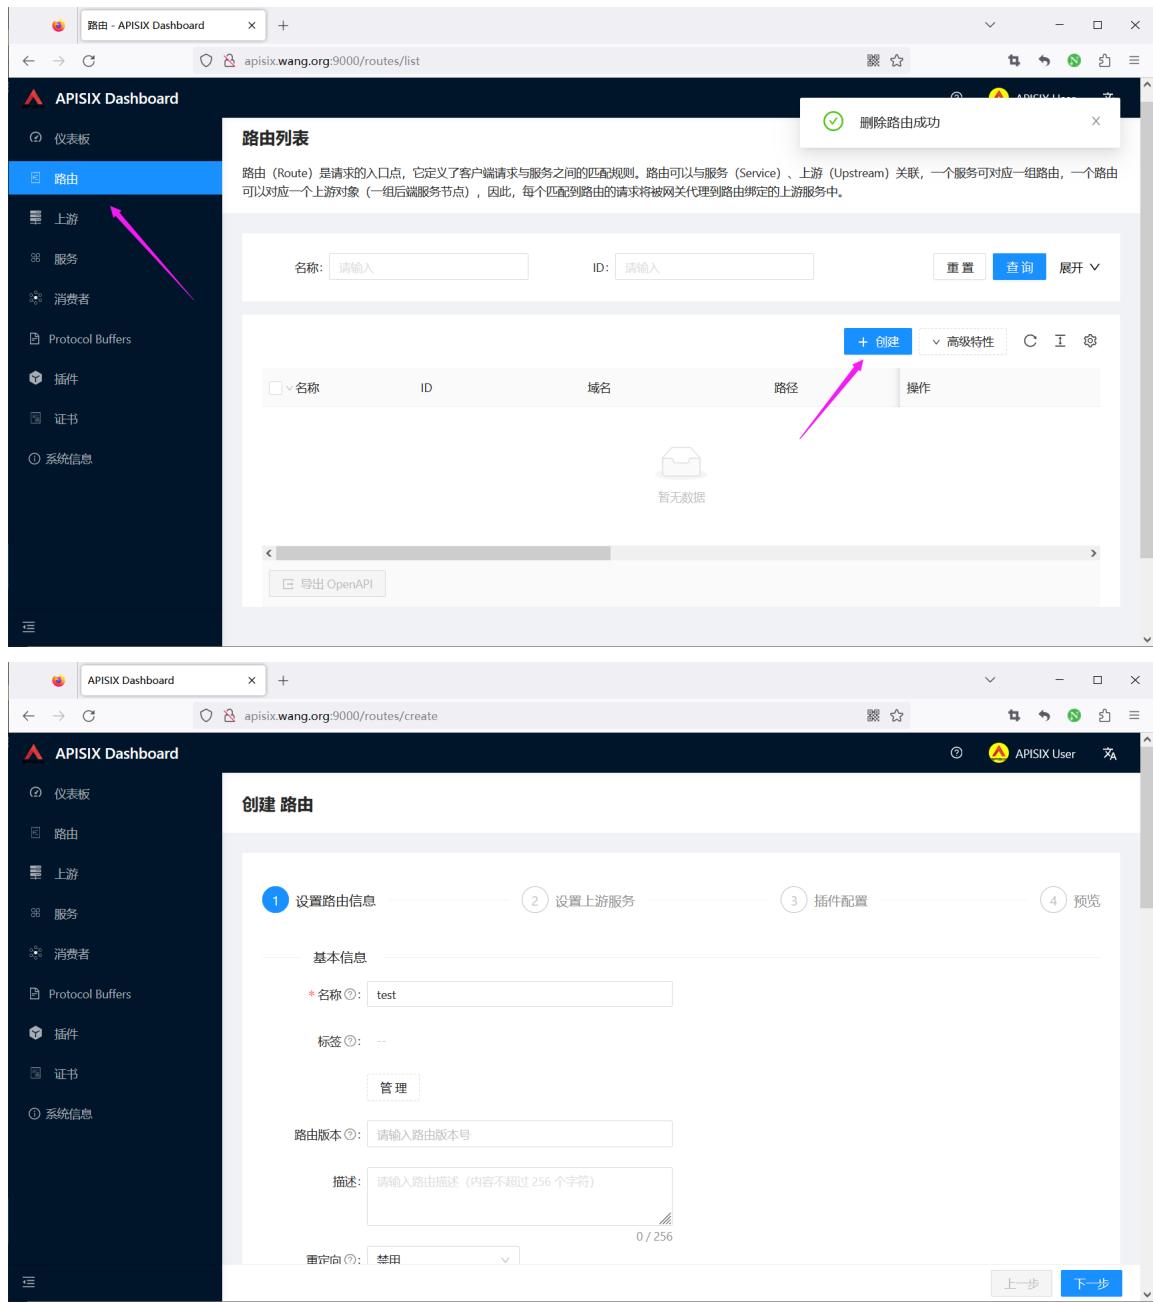
范例: 创建一个路由
#测试上游服务
[root@ubuntu2404 ~]#curl -H"host: www.example.com" http://httpbin.org/anything/foo?arg=18
#返回结果如下
{
  "args": {
    "arg": "18"
 },
  "data": "",
  "files": {},
  "form": {},
  "headers": {
    "Accept": "*/*",
    "Host": "www.example.com",
    "User-Agent": "curl/7.81.0",
    "X-Amzn-Trace-Id": "Root=1-6549f122-6a9539412936f9da26226cc5"
 },
  "json": null,
  "method": "GET",
  "origin": "1.203.173.227",
  "url": "http://www.example.com/anything/foo?arg=18"
}
#创建路由
[root@ubuntu2404 ~]#curl http://127.0.0.1:9180/apisix/admin/routes/1 \
-H 'X-API-KEY: edd1c9f034335f136f87ad84b625c8f1' -X PUT -i -d '
{
    "name": "testroute1",
    "methods": ["GET"],
    "hosts": ["www.example.com"],
    "uri": "/anything/*",
    "upstream": {
        "type": "roundrobin",
        "nodes": {
            "httpbin.org:80": 1
       }
   }
}'
#返回结果如下
HTTP/1.1 201 Created
Date: Tue, 07 Nov 2023 08:16:36 GMT
Content-Type: application/json
Transfer-Encoding: chunked
Connection: keep-alive
Server: APISIX/3.6.0
Access-Control-Allow-Origin: *
Access-Control-Allow-Credentials: true
Access-Control-Expose-Headers: *
Access-Control-Max-Age: 3600
X-API-VERSION: v3
{"value":{"uri":"/anything/*","hosts":["www.example.com"],"status":1,"methods":
["GET"],"priority":0,"upstream":{"pass_host":"pass","nodes":
{"httpbin.org:80":1},"hash_on":"vars","scheme":"http","type":"roundrobin"},"id":"1","create_time":1699344996,"
update_time":1699344996},"key":"/apisix/routes/1"}
#访问APISIX
[root@ubuntu2404 ~]#curl -XGET -H"host: www.example.com" http://127.0.0.1:9080/anything/foo?arg=18
{
  "args": {
    "arg": "18"
 },
  "data": "",
  "files": {},
  "form": {},
  "headers": {
    "Accept": "*/*",
    "Host": "www.example.com",
    "User-Agent": "curl/7.81.0",
    "X-Amzn-Trace-Id": "Root=1-6549f292-744f27f967c045d027e940a8",
    "X-Forwarded-Host": "www.example.com"
 },
  "json": null,
  "method": "GET",
  "origin": "172.18.0.1, 1.203.173.227",
  "url": "http://www.example.com/anything/foo?arg=18"
}
范例:删除路由
[root@ubuntu2404 ~]#curl -X DELETE http://127.0.0.1:9180/admin/admin/routes/1 -H 'X-API-KEY: edd1c9f034335f136f87ad84b625c8f1'
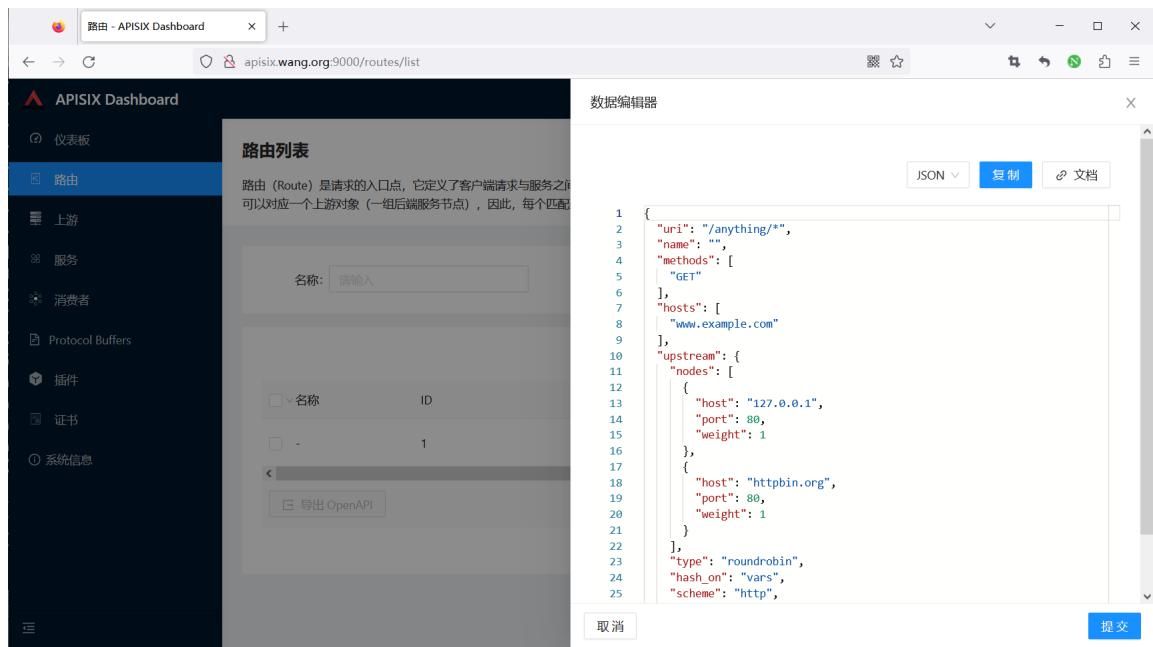
范例: 添加一个新的上游
#添加一个新的上游
[root@ubuntu2404 ~]#curl http://127.0.0.1:9180/apisix/admin/routes/1 \
-H 'X-API-KEY: edd1c9f034335f136f87ad84b625c8f1' -X PATCH -i -d '
{
    "upstream": {
        "nodes": {
            "127.0.0.1:80": 1
       }
   }
}'
[root@ubuntu2404 ~]#curl -XGET -H"host: www.example.com" http://127.0.0.1:9080/anything/foo?arg=18
{
  "args": {
    "arg": "18"
 },
  "data": "",
  "files": {},
  "form": {},
  "headers": {
    "Accept": "*/*",
    "Host": "www.example.com",
    "User-Agent": "curl/7.81.0",
    "X-Amzn-Trace-Id": "Root=1-6549f7d8-0de75e125f3af0e2733c6131",
    "X-Forwarded-Host": "www.example.com"
 },
  "json": null,
  "method": "GET",
  "origin": "172.18.0.1, 1.203.173.227",
  "url": "http://www.example.com/anything/foo?arg=18"
}
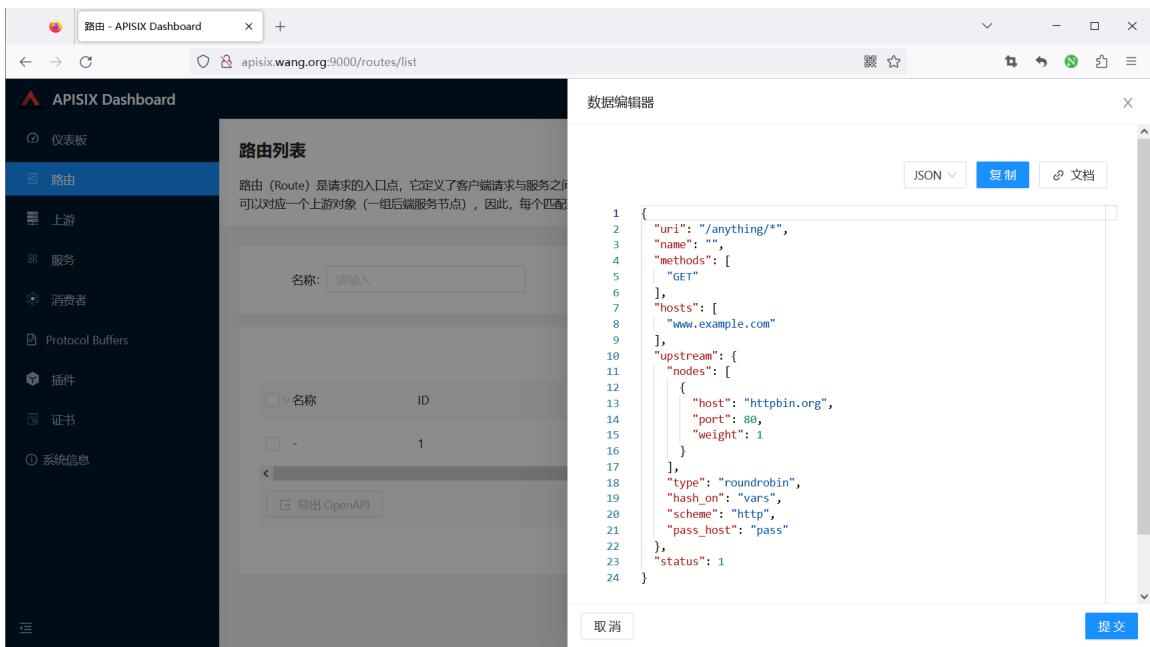
范例: 删除一个上游
[root@ubuntu2404 ~]#curl http://127.0.0.1:9180/apisix/admin/routes/1 \
-H 'X-API-KEY: edd1c9f034335f136f87ad84b625c8f1' -X PATCH -i -d '
{
    "upstream": {
        "nodes": {
            "127.0.0.1:80": null
       }
   }
}'
范例: 禁用路由
curl http://127.0.0.1:9180/apisix/admin/routes/1 \
-H 'X-API-KEY: edd1c9f034335f136f87ad84b625c8f1' -X PATCH -i -d '
{
    "status": 0
}'
#结果显示
 HTTP/1.1 200 OK
...
#执行成功后,`status` 将更新为:
{
    "status": 0
}
范例:启用路由
curl http://127.0.0.1:9180/apisix/admin/routes/1 \
-H 'X-API-KEY: edd1c9f034335f136f87ad84b625c8f1' -X PATCH -i -d '
{
    "status": 1
}'
#结果显示
 HTTP/1.1 200 OK
...
#执行成功后,`status` 将更新为:
{
    "status": 1
}
范例:创建多个域名的一个路由
curl http://127.0.0.1:9180/apisix/admin/routes/1 \
-H 'X-API-KEY: edd1c9f034335f136f87ad84b625c8f1' -X PATCH -i -d '
{
    "status": 1
}'
#结果显示
 HTTP/1.1 200 OK
...
#执行成功后,`status` 将更新为:
{
    "status": 1
}
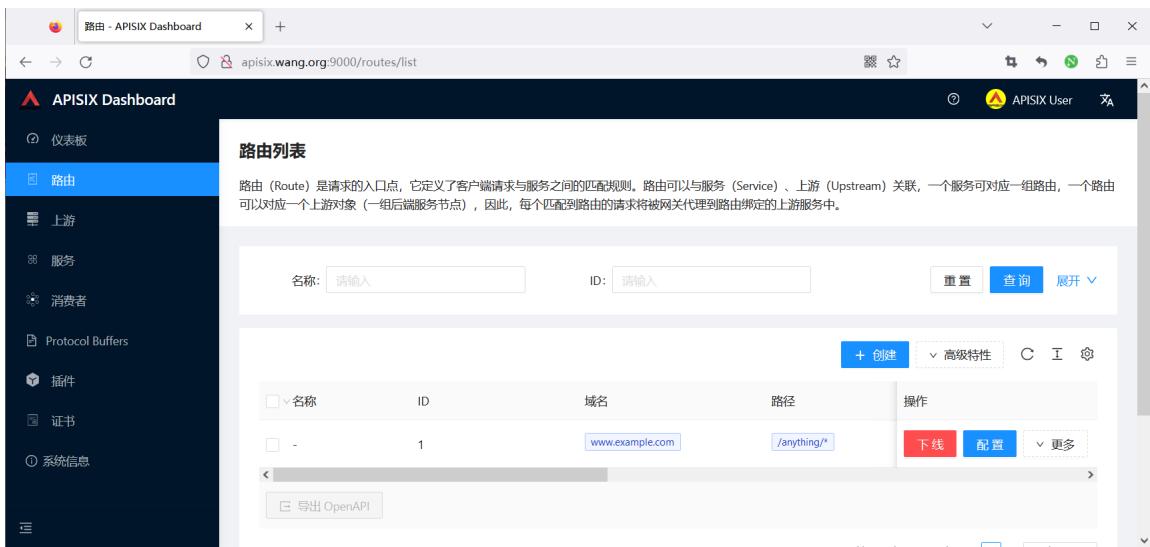
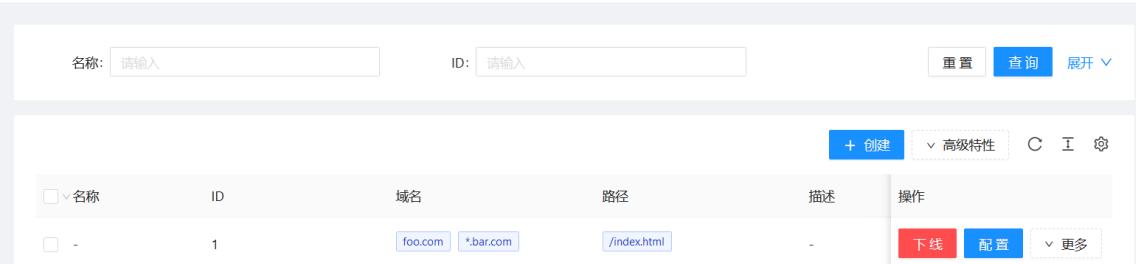
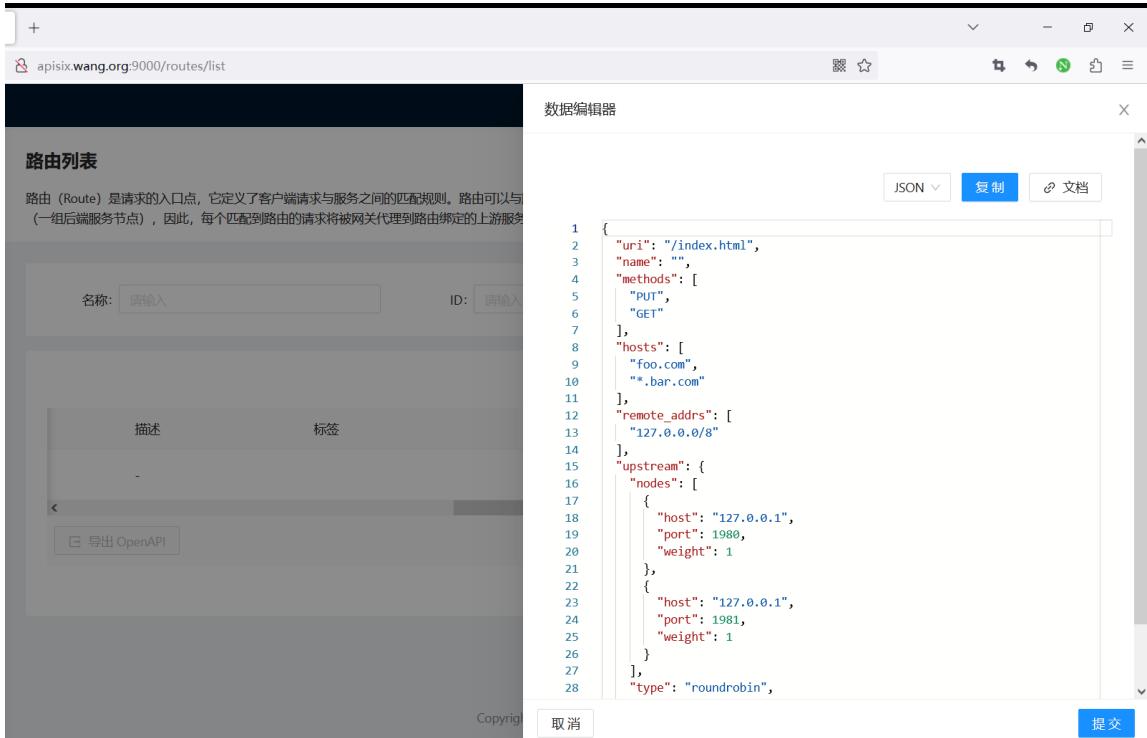
路由列表
路由(Route)是请求的入口点,它定义了客户端请求与服务之间的匹配规则。路由可以与服务(Sevice)、上游(Upstream)关联,一个服务可对应一组路由,一个路由可以对应一个上游对象(一组后端服务节点),因此,每个匹配到路由的请求将被网关代理到路由绑定的上游服务中。
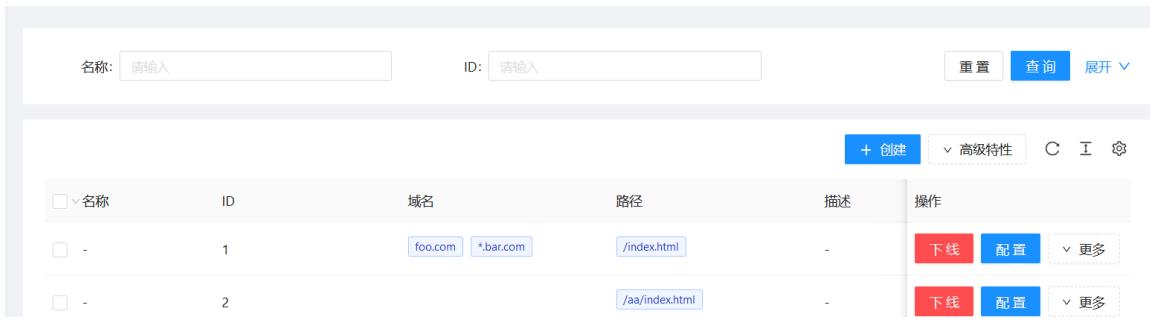
范例: 创建一个有效期为 60 秒的路由,过期后自动删除
curl 'http://127.0.0.1:9180/apisix/admin/routes/2?ttl=60' \
-H 'X-API-KEY: edd1c9f034335f136f87ad84b625c8f1' -X PUT -i -d '
{
    "uri": "/aa/index.html",
    "upstream": {
        "type": "roundrobin",
        "nodes": {
            "127.0.0.1:1980": 1
       }
   }
}'
#显示结果
HTTP/1.1 201 Created
date: Sat, 31 Aug 2019 01:17:15 GMT
...
#通过dashboard 可以查看到如下,过一分钟后则被删除
路由列表
路由(Route)是请求的入口点,它定义了客户端请求与服务之间的匹配规则。路由可以与服务 (Sevice)、上游(Upstream)关联,一个服务可对应一组路由,一个路由可以对应一个上游对象(一组后端服务节点),因此,每个匹配到路由的请求将被网关代理到路由绑定的上游服务中。
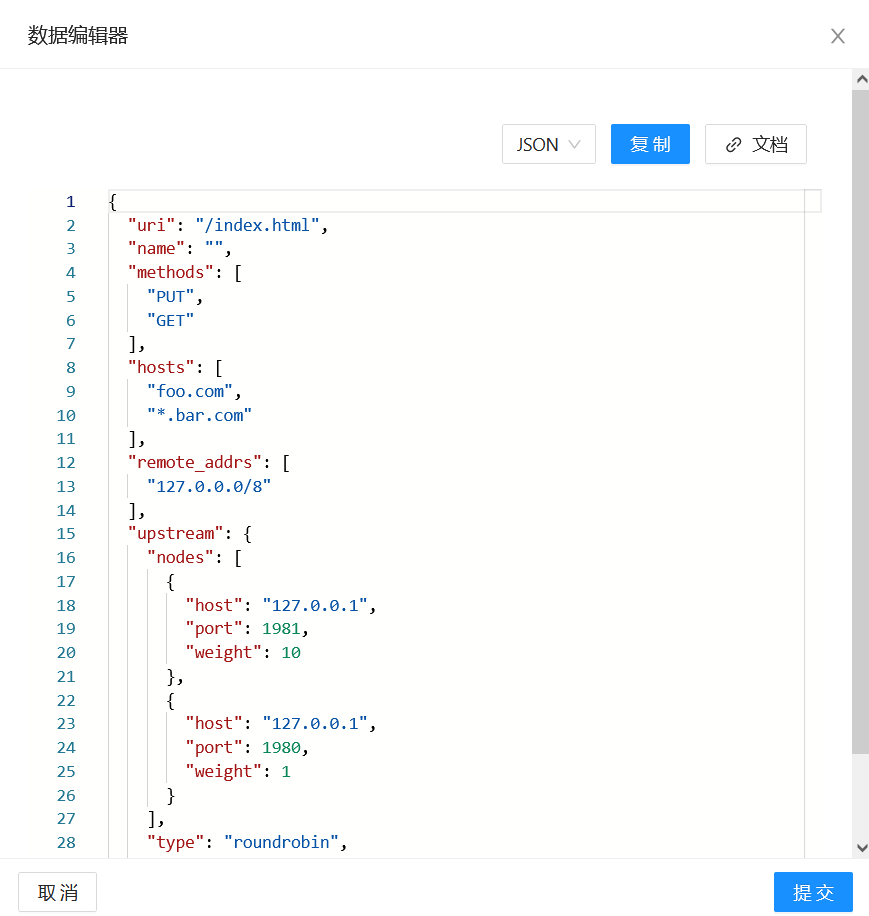
范例: 在路由中新增一个上游节点
范例: 更新路由中上游节点的权重
curl http://127.0.0.1:9180/apisix/admin/routes/1 \
-H 'X-API-KEY: edd1c9f034335f136f87ad84b625c8f1' -X PATCH -i -d '
{
    "upstream": {
        "nodes": {
            "127.0.0.1:1981": 1
        }
    }
}'

#结果显示
HTTP/1.1 200 OK
...

#执行成功后,上游节点将更新为:
{
    "127.0.0.1:1980": 1,
    "127.0.0.1:1981": 1
}
范例: 从路由中删除一个上游节点
curl http://127.0.0.1:9180/apisix/admin/routes/1 \
-H 'X-API-KEY: edd1c9f034335f136f87ad84b625c8f1' -X PATCH -i -d '
{
    "upstream": {
        "nodes": {
            "127.0.0.1:1980": null
        }
    }
}'

#结果显示
HTTP/1.1 200 OK
...

#执行成功后,Upstream `nodes` 将更新为:
{
    "127.0.0.1:1981": 10
}
范例: 更新路由中的 methods 数组
curl http://127.0.0.1:9180/apisix/admin/routes/1 \
-H 'X-API-KEY: edd1c9f034335f136f87ad84b625c8f1' -X PATCH -i -d '{
    "methods": ["GET", "POST"]
}'
#结果显示
HTTP/1.1 200 OK
...
执行成功后, methods 将不保留原来的数据,将更新为:
["GET", "POST"]
范例: 使用 sub path 更新路由中的上游节点:
curl http://127.0.0.1:9180/apisix/admin/routes/1/upstream/nodes \
-H 'X-API-KEY: edd1c9f034335f136f87ad84b625c8f1' -X PATCH -i -d '
{
    "127.0.0.1:1982": 1
}'
#结果显示
 HTTP/1.1 200 OK
...
#执行成功后,`nodes` 将不保留原来的数据,整个更新为:
{
   "127.0.0.1:1982": 1
}
范例: 使用 sub path 更新路由中的 methods :
curl http://127.0.0.1:9180/apisix/admin/routes/1/methods \
-H 'X-API-KEY: edd1c9f034335f136f87ad84b625c8f1' -X PATCH -i -d '["POST", "DELETE", "PATCH"]'
#结果显示
HTTP/1.1 200 OK
...
#执行成功后,`methods` 将不保留原来的数据,更新为:
["POST", "DELETE", "PATCH"
2.3 管理上游 Upstream
https://apisix.apache.org/zh/docs apisix/admin-api/#upstream
Upstream 上游列表包含了已创建的上游服务(即后端服务),可以对上游服务的多个目标节点进行负载均衡和健康检查。
Upstream 是虚拟主机抽象,对给定的多个服务节点按照配置规则进行负载均衡。
Upstream 的地址信息可以直接配置到 Route (或 Service ) 上,当 Upstream 有重复时,需要用“引用”方式避免重复。
请求地址#
Upstream 资源请求地址:/apisix/admin/upstreams/{id}
请求方法#
| 名称 | 请求 URI | 请求body | 描述 |
|---|---|---|---|
| GET | {/apis/admin upstreams/{id} | 无 | 获取资源。 |
| PUT | {/apis/admin upstreams/{id} | {...} | 创建指定 id 的资源。 |
| POST | {/apis/admin upstreams | {...} | 创建资源,id由后台服务自动生成。 |
| DELETE | {/apis/admin upstreams/{id} | 无 | 删除资源。 |
| PATCH | {/apis/admin upstreams/{id} | {...} | 标准 PATCH,修改已有 Upstream 的部分属性,其他不涉及的属性会原样保留;如果需要删除某个属性,可将该属性的值设置为null;注意:当需要修改属性的值为数组时,该属性将全量更新。 |
| PATCH | {/apis/admin upstreams/{id}/{path} | {...} | SubPath PATCH,通过 {path} 指定 Upstream 需要更新的属性,全量更新该属性的数据,其他不涉及的属性会原样保留。 |
body 请求参数#
APISIX 的 Upstream 除了基本的负载均衡算法选择外,还支持对上游做主被动健康检查、重试等逻辑。详细信息如下:
| 名称 | 必选项 | 类型 | 描述 | 示例 |
|---|---|---|---|---|
| type | 否 | 枚举 | 负载均衡算法,默认值是 roundrobin。 | |
| nodes | 是,与 service_name 二选一。 | Node | 哈希表或数组,当它是哈希表时,内部元素的key是上游机器地址列表,格式为地址+(可选的)端口,其中地址部分可以是IP也可以是域名,比如192.168.1.100:80、foo.com:80等。对于哈希表的情况,如果key是IPv6地址加端口,则必须用中括号将IPv6地址括起来。value则是节点的权重。当它是数组时,数组中每个元素都是一个哈希表,其中包含host、weight以及可选的port、priority。nodes可以为空,这通常用作占位符。客户端命中这样的上游会返回502。 | 192.168.1.100:80,[::1]:80 |
| service_name | 是,与 nodes 二选一。 | string | 服务发现时使用的服务名,请参考生成服务发现注册中心。 | a-bootful-client |
| discovery_type | 是,与 service_name 配合使用。 | string | 服务发现类型,请参考集成服务发现注册中心。 | eureka |
| key | 条件必需 | 匹配类型 | 该选项只有类型是hash 才有效。根据key来查找对应的节点id,相同的key 在同一个对象中,则返回相同id。目前支持的NGINX内置变量有url、server_name、server_add、request.uri、remote_port、remote_add、query_string、host、hostname、arg*,其中arg*是来自URL的请求参数,详细信息请参考NGINX变量列表。 | |
| checks | 否 | health_checker | 配置健康检查的参数,详细信息请参考health_check。 | |
| retries | 否 | 整型 | 使用NGINX重试机制将请求传递给下一个上游,默认启用重试机制且次数为后端可用的节点数量。如果指定了具体重试次数,它将覆盖默认值。当设置为0时,表示不启用重试机制。 | |
| retry_timeout | 否 | number | 限制是否继续重试的时间,若之前的请求和重试请求花费太多时间就不再继续重试。当设置为0时,表示不启用重试超时机制。 | |
| timeout | 否 | 超时时间对象 | 设置连接、发送消息、接收消息的超时时间,以秒为单位。 | {"connect":0.5,"send":0.5,"read":0.5} |
| hash_on | 否 | 辅助 | hash_on 支持的类型有vars (NGINX内置变量), header(自定义header), cookie, consumer, 默认值为 vars。 | |
| name | 否 | 辅助 | 标识上游服务名称、使用场景等。 | |
| desc | 否 | 辅助 | 上游服务描述、使用场景等。 | |
| pass_host | 否 | 枚举 | 请求发给上游时的host 设置选型,[pass, node, rewrite]之一,默认是pass。pass:将客户端的host 传给上游;node:使用 upstream node 中配置的 host; rewrite:使用配置项 upstream_host 的值。 | |
| upstream_host | 否 | 辅助 | 指定上游请求的host,只在pass_host配置为rewrite时有效。 | |
| scheme | 否 | 辅助 | 跟上游通信时使用的 scheme。对于7层代理,可选值为[http, https, grpc,grpcs],对于4层代理,可选值为[tcp, udp, tls].默认值为http,详细信息请参考下文。 | |
| labels | 否 | 匹配规则 | 标识附加属性的键值对。 | {"version":"v2","build":"16","env":"production"} |
| create_time | 否 | 辅助 | epoch时间戳,单位为秒。如果不指定则自动创建。 | 1602883670 |
| update_time | 否 | 辅助 | epoch时间戳,单位为秒。如果不指定则自动创建。 | 1602883670 |
| tls_client_cert | 否,不能和TLS client_cert_id一起使用 | https证书 | 设置跟上游通信时的客户端证书,详细信息请参考下文。 | |
| tls_client_key | 否,不能和TLS client_cert_id一起使用 | https证书私钥 | 设置跟上游通信时的客户端私钥,详细信息请参考下文。 | |
| tls_client_cert_id | 否,不能和TLS client_cert、TLS client_key一起使用 | SSL | 设置引用的SSL id,详见 SSL。 | |
| keepalive_pool.size | 否 | 辅助 | 动态设置keepalived指令,详细信息请参考下文。 | |
| keepalive_pool.idle_timeout | 否 | 辅助 | 动态设置keepalived_timeout指令,详细信息请参考下文。 | |
| keepalive_pool.request | 否 | 辅助 | 动态设置keepalived_request指令,详细信息请参考下文。 |
type 详细信息如下:
- roundrobin : 带权重的 Round Robin。
- chash : 一致性哈希。
- ewma : 选择延迟最小的节点,请参考 EWMA_chart。
- least_conn : 选择 (active_conn + 1) / weight 最小的节点。此处的 active connection 概念跟 NGINX 的相同,它是当前正在被请求使用的连接。
- 用户自定义的 balancer,需要可以通过 require("apisix.balancer.your_balancer") 来加载。
hash_on 详细信息如下:
- 设为 vars 时, key 为必传参数,目前支持的 NGINX 内置变量有 uri, server_name, server_addr, request_uri,remote_port, remote_addr, query_string, host, hostname, arg_ ,其中 arg_ 是来自 URL 的请求参数。详细信息请参考 NGINX 变量列表。
- 设为 header 时, key 为必传参数,其值为自定义的 Header name,即 "http_ key "。
- 设为 cookie 时, key 为必传参数,其值为自定义的 cookie name,即 "cookie_ key "。请注意 cookie name 是区分大小写字母的。例如: cookie_x_foo 与 cookie_X_Foo 表示不同的 cookie 。
- 设为 consumer 时, key 不需要设置。此时哈希算法采用的 key 为认证通过的 consumer_name 。
- 如果指定的 hash_on 和 key 获取不到值时,使用默认值: remote_addr 。
以下特性需要 APISIX 运行于 APISIX-Base:
-
scheme 可以设置成 tls ,表示 TLS over TCP 。
-
tls.client_cert/key 可以用来跟上游进行 mTLS 通信。他们的格式和 SSL 对象的 cert 和 key 一样。
-
tls.client_cert_id 可以用来指定引用的 SSL 对象。只有当 SSL 对象的 type 字段为 client 时才能被引用,否则请求会被 APISIX拒绝。另外,SSL 对象中只有 cert 和 key 会被使用。
-
keepalive_pool 允许 Upstream 有自己单独的连接池。它下属的字段,比如 requests,可以用于配置上游连接保持的参数。
Upstream 对象 JSON 配置示例:
{
    "id": "1",                  #id
    "retries": 1,               #请求重试次数
    "timeout": {                #设置连接、发送消息、接收消息的超时时间,每项都为 15 秒
        "connect":15,
        "send":15,
        "read":15
   },
    "nodes": {"host:80": 100},  #上游机器地址列表,格式为`地址 + 端口`
                                #等价于 "nodes": [ {"host":"host", "port":80, "weight": 100} ],
    "type":"roundrobin",
    "checks": {},               #配置健康检查的参数
    "hash_on": "",
    "key": "",
    "name": "upstream-xxx",     #upstream 名称
    "desc": "hello world",      #upstream 描述
    "scheme": "http"            #跟上游通信时使用的 scheme,默认是 `http`
}
范例: 创建 Upstream 并对 nodes 的数据进行修改
https://apisix.apache.org/zh/docs/apisix/admin-api/#create-upstream
1、创建 Upstream:
curl http://127.0.0.1:9180/apisix/admin/upstreams/1 \
-H 'X-API-KEY: edd1c9f034335f136f87ad84b625c8f1' -i -X PUT -d '
{
    "type":"roundrobin",
    "nodes":{
        "127.0.0.1:1980": 1
   }
}'
HTTP/1.1 201 Created
...
2、在路由中绑定上面创建的 Upstream
curl http://127.0.0.1:9180/apisix/admin/routes/1 \
-H 'X-API-KEY: edd1c9f034335f136f87ad84b625c8f1' -X PUT -i -d '
{
    "methods": ["GET"],
    "hosts": ["www.example.com"],
    "uri": "/anything/*",
    "upstream_id": "1"
}
3、在 Upstream 中添加一个节点:
curl http://127.0.0.1:9180/apisix/admin/upstreams/100 \
-H 'X-API-KEY: edd1c9f034335f136f87ad84b625c8f1' -X PATCH -i -d '
{
    "nodes": {
        "127.0.0.1:1981": 1
   }
}'
HTTP/1.1 200 OK
...
执行成功后,nodes 将更新为:
{
  "127.0.0.1:1980": 1,
  "127.0.0.1:1981": 1
}
4、更新 Upstream 中单个节点的权重:
curl http://127.0.0.1:9180/apisix/admin/upstreams/100 \
-H 'X-API-KEY: edd1c9f034335f136f87ad84b625c8f1' -X PATCH -i -d '
{
    "nodes": {
        "127.0.0.1:1981": 10
   }
}

#回显
HTTP/1.1 200 OK
...
执行成功后,nodes 将更新为:
{
"127.0.0.1:1980": 1,
"127.0.0.1:1981": 10
}
5、删除 Upstream 中的一个节点:
curl http://127.0.0.1:9180/apisix/admin/upstreams/100 \
-H 'X-API-KEY: edd1c9f034335f136f87ad84b625c8f1' -X PATCH -i -d '
{
    "nodes": {
        "127.0.0.1:1980": null
   }
}
执行成功后,nodes 将更新为:
{
    "127.0.0.1:1981": 10
}
6、更新 Upstream 的 nodes :
curl http://127.0.0.1:9180/apisix/admin/upstreams/100/nodes \
-H 'X-API-KEY: edd1c9f034335f136f87ad84b625c8f1' -X PATCH -i -d '
{
    "127.0.0.1:1982": 1
}

#回显
HTTP/1.1 200 OK
执行成功后,nodes 将不再保留原来的数据:
{
    "127.0.0.1:1982": 1
}
三、APISIX 案例
3.1 Apache APISIX 集成 Nacos 说明
在微服务体系中,各个业务服务的地址是动态变化的,并且服务之间会频繁互相调用,因些需要对各个服务的IP、port 等路由信息进行统一的管理。
注册中心本质上是为了解耦服务提供者和服务消费者
注册中心的核心功能:
- 服务注册:服务提供方向注册中心进行注册。
- 服务发现:服务消费方可以通过注册中心寻找到服务提供方的调用路由信息。
- 健康检测:确保注册到注册中心的服务节点是可以被正常调用的,避免无效节点导致的调用资源不可用等异常问题。
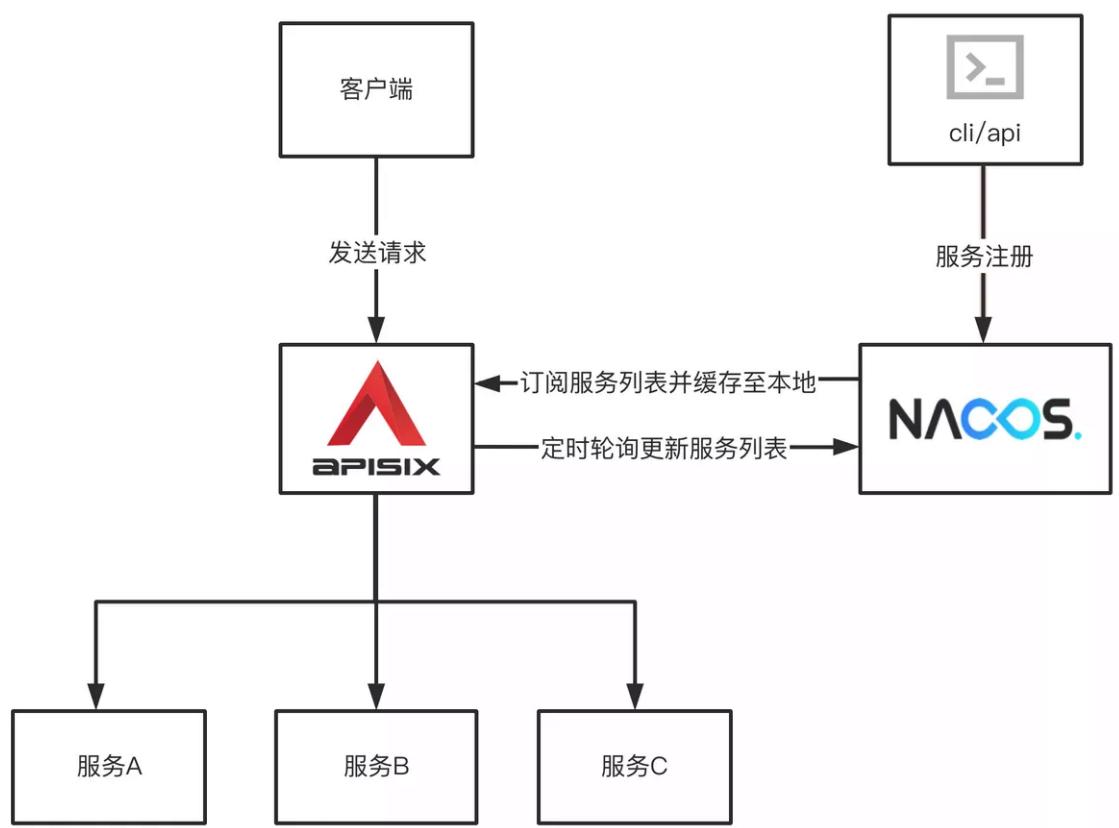
Apache APISIX结合Nacos可以将各个微服务节点中与业务无关的各项控制,集中在Apache APISIX中进行统一管理
即通过Apache APISIX实现接口服务的代理和路由转发的能力。
在Nacos上注册各个微服务后,Apache APISIX可以通过Nacos的服务发现功能获取服务列表,查找对应的服务地址从而实现动态代理。
APISIX 配置说明
在apisix的配置文件conf/config.yaml 中添加以下配置:
#详细配置
discovery:
  nacos:
    host:
      - "http://${username}:${password}@${host1}:${port1}"
    prefix: "/nacos/v1/"
    fetch_interval: 30 #default 30sec
    weight: 100        #default 100
    timeout:
      connect: 2000    #default 2000 ms
      send: 2000       #default 2000 ms
      read: 5000       #default 5000 ms

#简化配置(使用默认配置):
discovery:
  nacos:
    host:
      - "http://nacos.wang.org:8848"
创建路由时指定服务发现类型为 Nacos 相关信息
curl http://127.0.0.1:9180/apisix/admin/routes/1 -H 'X-API-KEY: edd1c9f034335f136f87ad84b625c8f1' -X PUT -d '
{
"uri" : "/nacos/*",
"upstream" : {
  "service_name": "APISIX-NACOS",
  "type" : "roundrobin",
  "discovery_type": "nacos",
  "service_name": "nacos-consumer-api",
  "discovery_args": {
    "namespace_id": "testns",
    "group_name": "testgroup"
  }
}
}'
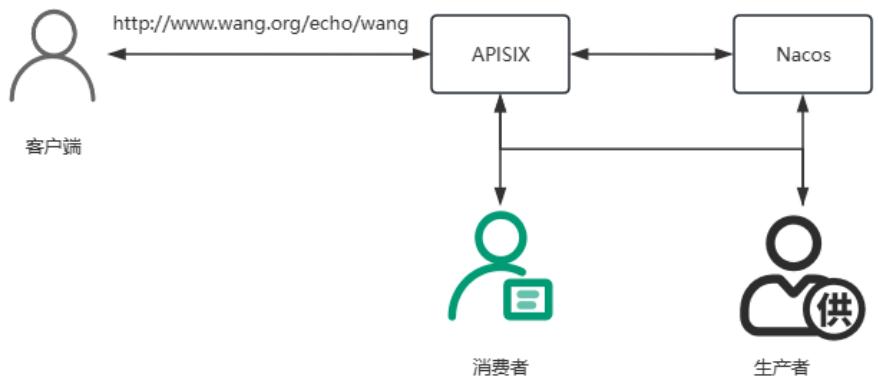
3.2 案例:Apache APISIX 集成 Nacos 实现服务发现项目
实现访问http://www.wang.org/echo/ 路径转发后面的微服务
| IP | 备注 |
|---|---|
| 10.0.0.100 | APISIX, APISIX-Director, Nacos |
| 10.0.0.101:8001 | Provider 应用 |
| 10.0.0.102:8002 | Consumer 应用 |
3.2.1 准备 Nacos 服务
#安装 Nacos 服务.可以和APISIX部署在同一台主机,可以下面方式之一部署并启动
#方法1:docker启动
[root@ubuntu2404 ~]#docker run --name nacos -e MODE=standalone -p 8848:8848 -p 9848:9848 -d registry.cnbeijing.aliyuncs.com/wangxiaochun/nacos-server:v2.4.3-slim
[root@ubuntu2404 ~]#docker run --name nacos -e MODE=standalone -p 8848:8848 -p 9848:9848 -d nacos/nacosserver:v2.2.3-slim

#方法2:二进制启动
[root@ubuntu2404 ~]#bash install_nacos_single_node.sh
3.2.2 准备两个微服务生产者和消费者
#分别在不同主机上准备两个应用:provider和consumer
#启动应用provider
[root@ubuntu2404 ~]#cat nacos-provider/src/main/resources/application.properties
server.port=8001
spring.application.name=nacos-provider-api
spring.cloud.nacos.discovery.server-addr=nacos.wang.org:8848
#编译完后直接运行,支持JRE8,11,17,21
[root@ubuntu2404 ~]#apt update && apt install -y openjdk-21-jre
[root@ubuntu2404 ~]#apt update && apt install -y openjdk-17-jre
[root@ubuntu2404 ~]#java -version
openjdk version "17.0.13" 2024-10-15
OpenJDK Runtime Environment (build 17.0.13+11-Ubuntu-2ubuntu122.04)
OpenJDK 64-Bit Server VM (build 17.0.13+11-Ubuntu-2ubuntu122.04, mixed mode, sharing)
[root@ubuntu2404 ~]#java -jar nacos-provider/target/nacos-provider-1.0-SNAPSHOT.jar
#启动应用consumer
[root@ubuntu2404 ~]#cat nacos-consumer/src/main/resources/application.properties
server.port=8002
spring.application.name=nacos-consumer-api
spring.cloud.nacos.discovery.server-addr=nacos.wang.org:8848
[root@ubuntu2404 ~]#java -jar nacos-consumer/target/nacos-consumer-1.0-SNAPSHOT.jar
#测试访问两个应用:provider和consumer
#provider
[root@ubuntu2404 ~]#curl http://10.0.0.101:8001/echo/wangxiaochun/
Nacos Discovery Provider Service Message : wangxiaochun
#consumer
[root@ubuntu2404 ~]#curl http://10.0.0.102:8002/echo/wangxiaochun/
Nacos Discovery Consumer Service Operation Result From : Nacos Discovery Provider Service Message :
wangxiaochun
#在Nacos上可以看到两个服务provider和consumer注册成功
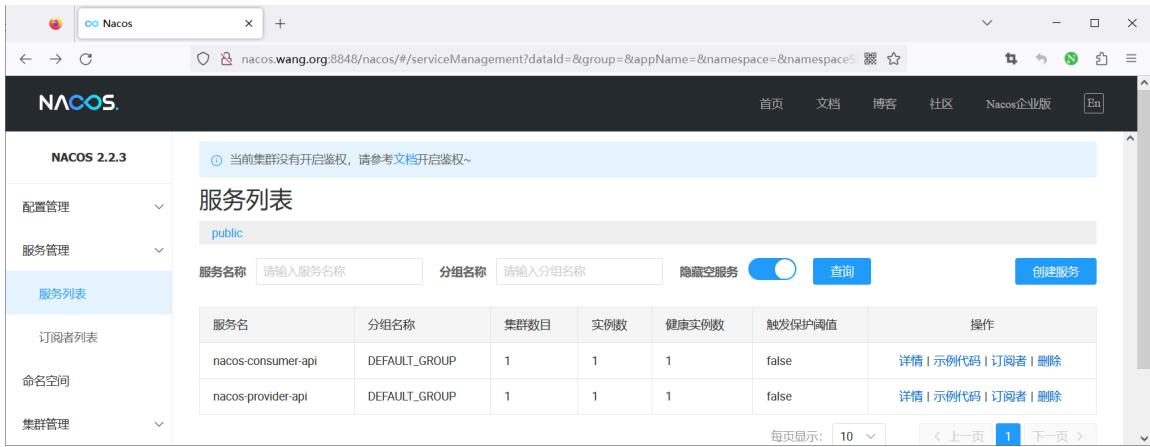
3.2.3 安装 APISIX 并配置使用Nacos 注册中心
范例:基于二进制包安装 APISIX
[root@ubuntu2404 ~]#vim /usr/local/apisix/conf/config.yaml
#最后添加下面行
discovery:
 nacos:
   host:
    - "http://nacos.wang.org:8848"  #指定Nacos地址信息

[root@ubuntu2404 ~]#systemctl restart apisix.service
范例: 基于docker-compose 启动APISIX和Dashboard
#名称解析
[root@ubuntu2404 ~]#cat /etc/hosts
10.0.0.100 nacos.wang.org

#基于Docker-compose部署APISIX和Dashboard
#注意:从2023年11月6日后面版本已经删除APISIX-Dashboard
#使用旧版的dashboard方法1
[root@ubuntu2404 ~]#git clone https://github.com/apache/apisix-docker.git
[root@ubuntu2404 ~]#cd apisix-docker/

#默认新版中删除了APISIX-Dashboard
[root@ubuntu2404 apisix-docker]#grep dashboard example/docker-compose.yml
      - "./grafana_conf/dashboards:/var/lib/grafana/dashboards"

#查看commitid
[root@ubuntu2404 apisix-docker]#git log
commit aa6581dbbfa4e26dcf3f233e4a65f62ee447d18 (HEAD -> master, origin/release/apisix-3.7.0, origin/master, origin/HEAD)
Author: AlinsRan <alinsran@apache.org>
Date:   Thu Nov 23 18:02:03 2023 +0800
   feat: release APISIX 3.7.0 (#521)

commit 8e3bf6f1ad0e9e1d4e3fca97bf3419cc24fbf690
Author: Gallardot <gallardot@apache.org>
Date:   Wed Nov 22 17:19:34 2023 +0800
   doc: fix typo (#520)

commit 2f226c7b606b06f4b5a35a782d482998f21cd640
Author: Liu Wei <monkeydluffy6017@gmail.com>
Date:   Wed Nov 8 14:19:03 2023 +0800
   feat: remove apisix-dashboard (#518)             #删除dashboard

commit 5720e8a520a34d7bf31a188576f4f4ea6ca07983
Author: Liu Wei <monkeydluffy6017@gmail.com>
Date:   Tue Nov 7 16:11:53 2023 +0800
   feat: remove apisix-dashboard (#516)            #删除dashboard

commit bf08d86aad95859e010a2cede7f5c697a3f71e2e     #使用带有dashboard的版本
Author: Abhishek Choudhary <shreemaan.abhishek@gmail.com>
Date:   Mon Oct 16 14:05:48 2023 +0545
   chore: remove docker image scanning (#515)
........

#回滚至指定版本
[root@ubuntu2404 apisix-docker]#git reset --hard bf08d86aad95859e0

#确认回滚成功
8.6.2.4 APISIX 添加路由
8.6.2.4.1 方法1: 通过API 添加路由

[root@ubuntu2404 apisix-docker]#grep dashboard example/docker-compose.yml
 apisix-dashboard:
   image: apache/apisix-dashboard:3.0.1-alpine
    - ./dashboard_conf/conf.yaml:/usr/local/apisix-dashboard/conf/conf.yaml
      - "./grafana_conf/dashboards:/var/lib/grafana/dashboards"

#使用旧版的dashboard方法2
[root@ubuntu2404 ~]#unzip apisix-docker-master.zip
[root@ubuntu2404 ~]#cd apisix-docker-master/example
[root@ubuntu2404 example]#ls
apisix_conf     docker-compose-arm64.yml       docker-compose.yml grafana_conf prometheus_conf
dashboard_conf docker-compose-standalone.yml etcd_conf           mkcert       upstream

#配置APISIX使用nacos地址
[root@ubuntu2404 example]#vim apisix_conf/config.yaml
.......
apisix:
 node_listen: 9080              #APISIX listening port
 enable_ipv6: false
 enable_control: true
 control:
   ip: "0.0.0.0"
   port: 9092

#添加下面行
discovery:
 nacos:
   host:
    - "http://10.0.0.100:8848"  #指定Nacos地址信息
......

#重启生效
[root@ubuntu2404 example]#docker-compose restart
3.2.4 APISIX 添加路由
3.2.4.1 方法1: 通过API 添加路由
[root@ubuntu2404 ~]#curl http://127.0.0.1:9180/apisix/admin/routes/1 -H 'X-API-KEY:
edd1c9f034335f136f87ad84b625c8f1' -X PUT -d '{
"uri": "/echo/*",
"name": "nacos-consumer",
"methods": ["GET"],
"host": "www.wang.org",
"upstream": {
"type": "roundrobin",
"scheme": "http",
"discovery_type": "nacos",
"pass_host": "pass",
"service_name": "nacos-consumer-api"
}
}'
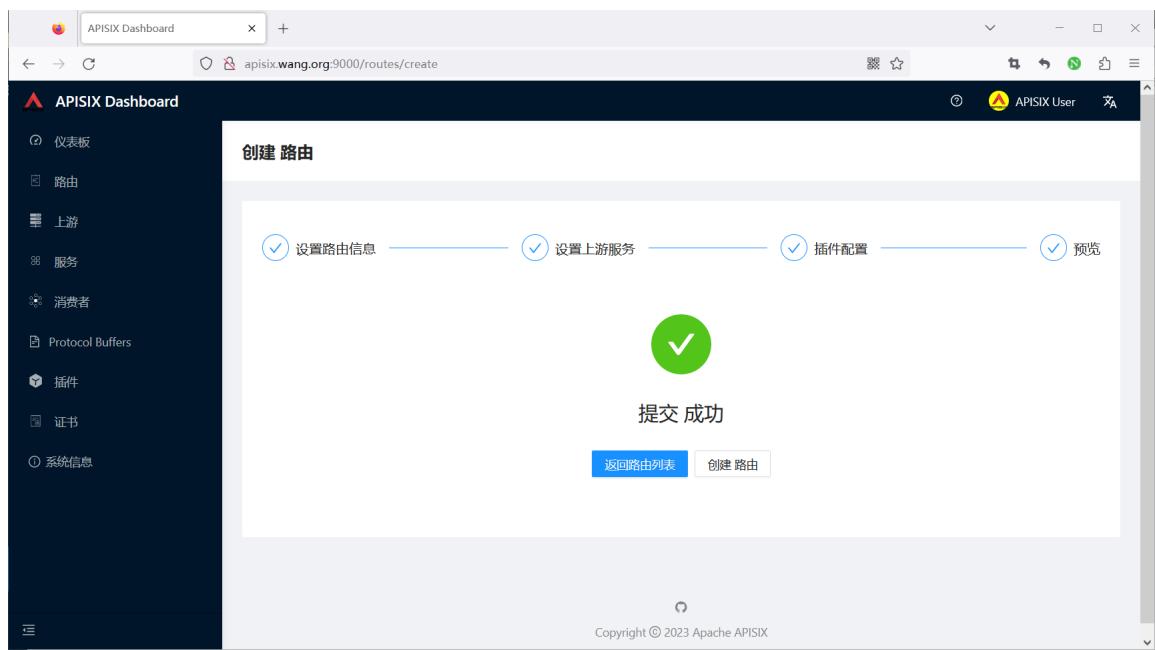
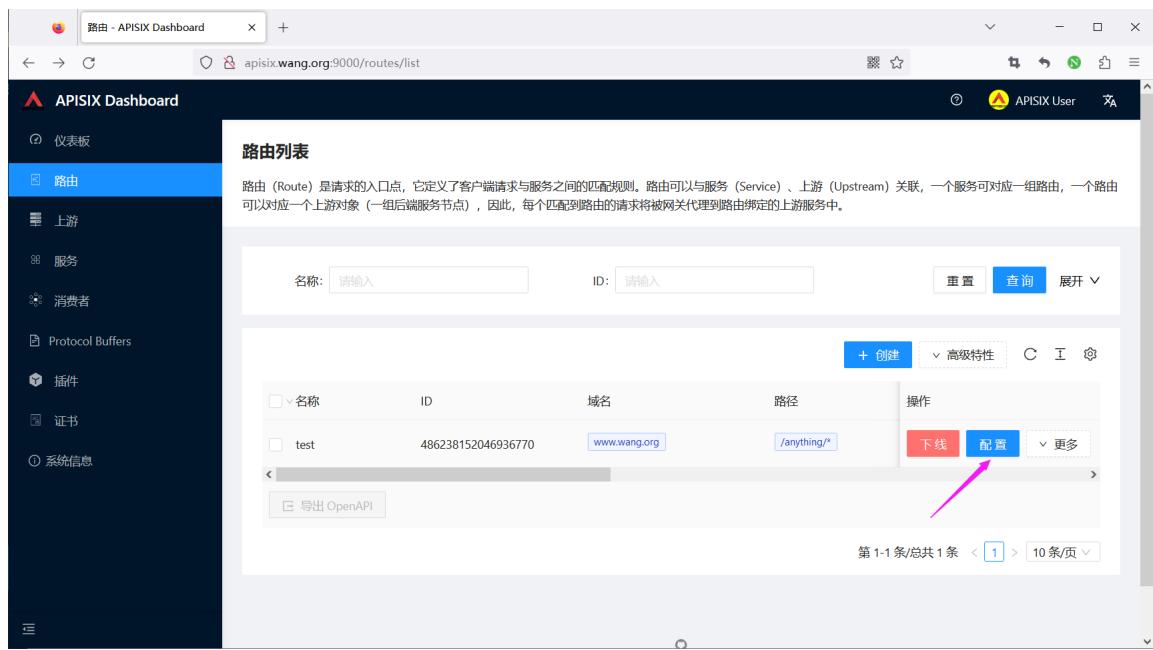
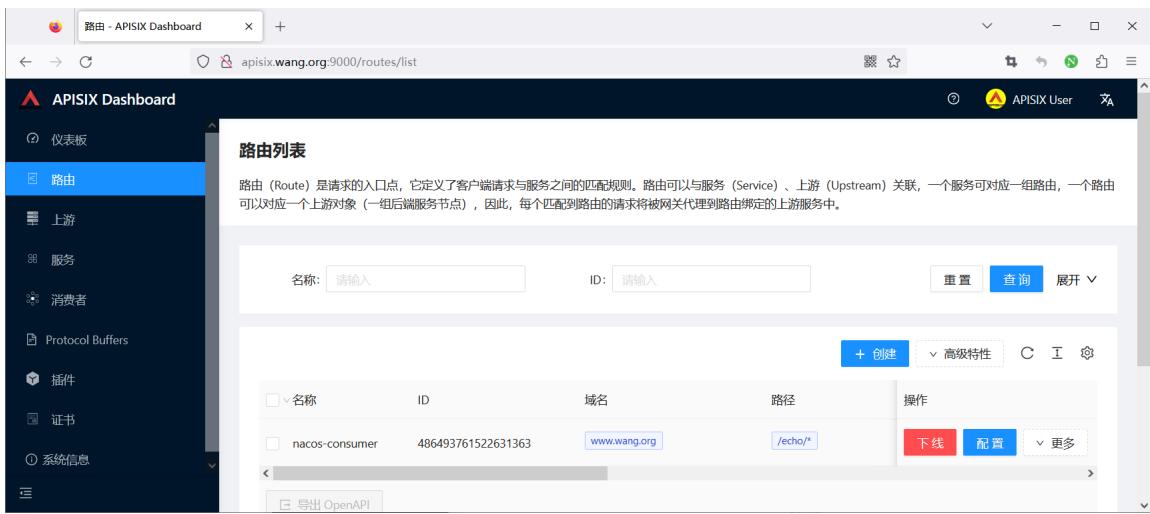
#登录apisix Dashboard,确认路由创建成功
http://apisix.wang.org:9000/

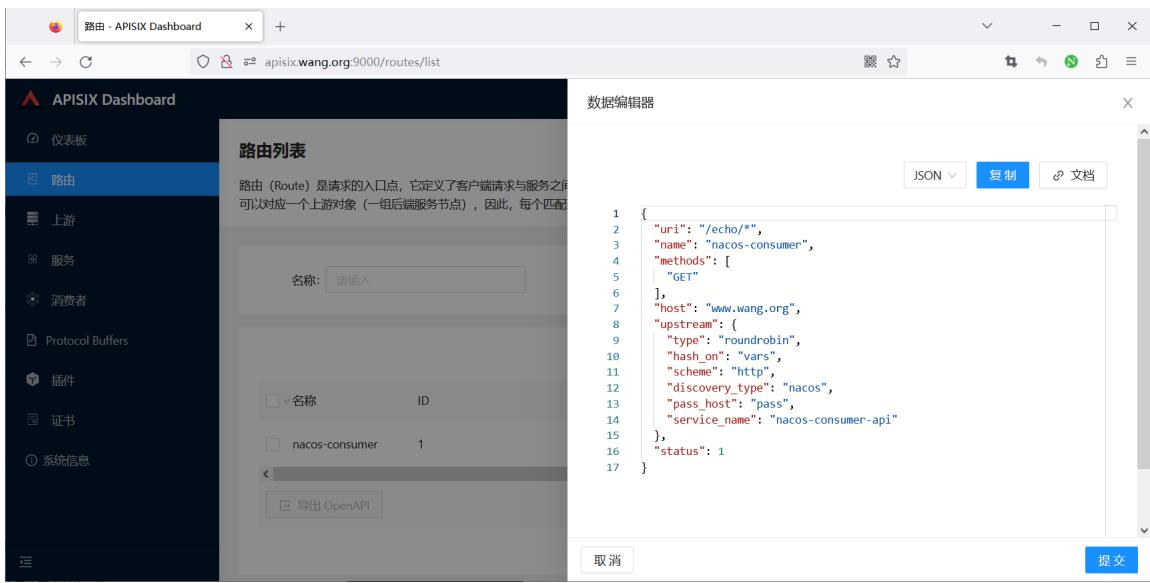
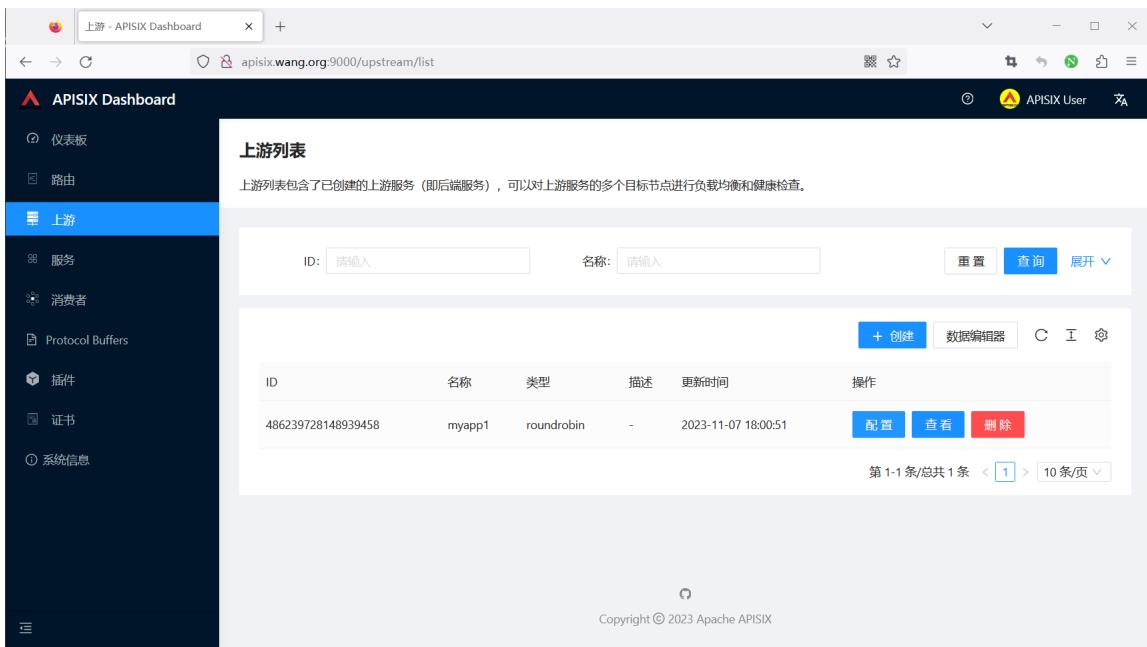
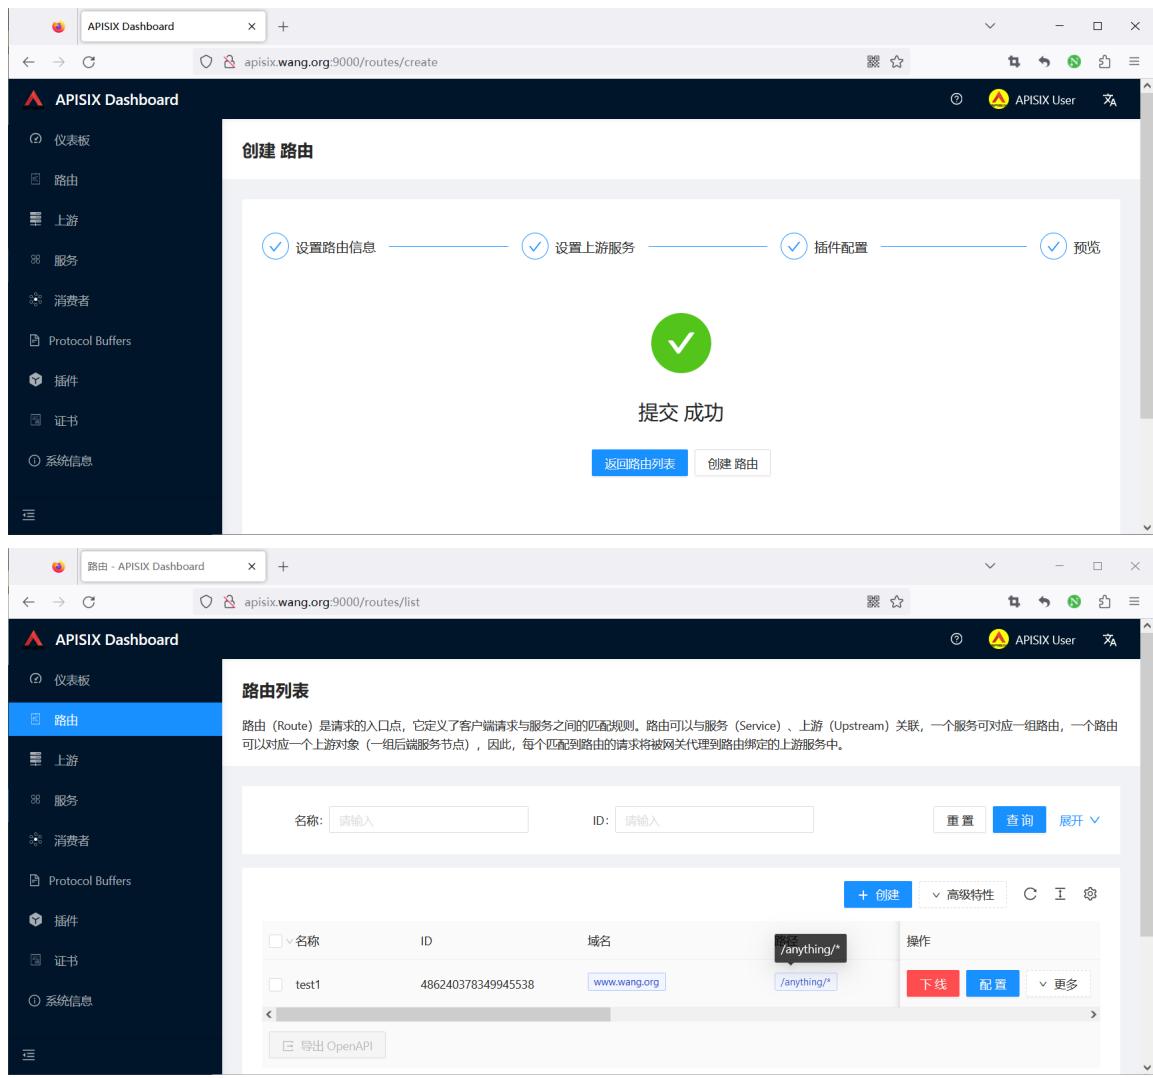
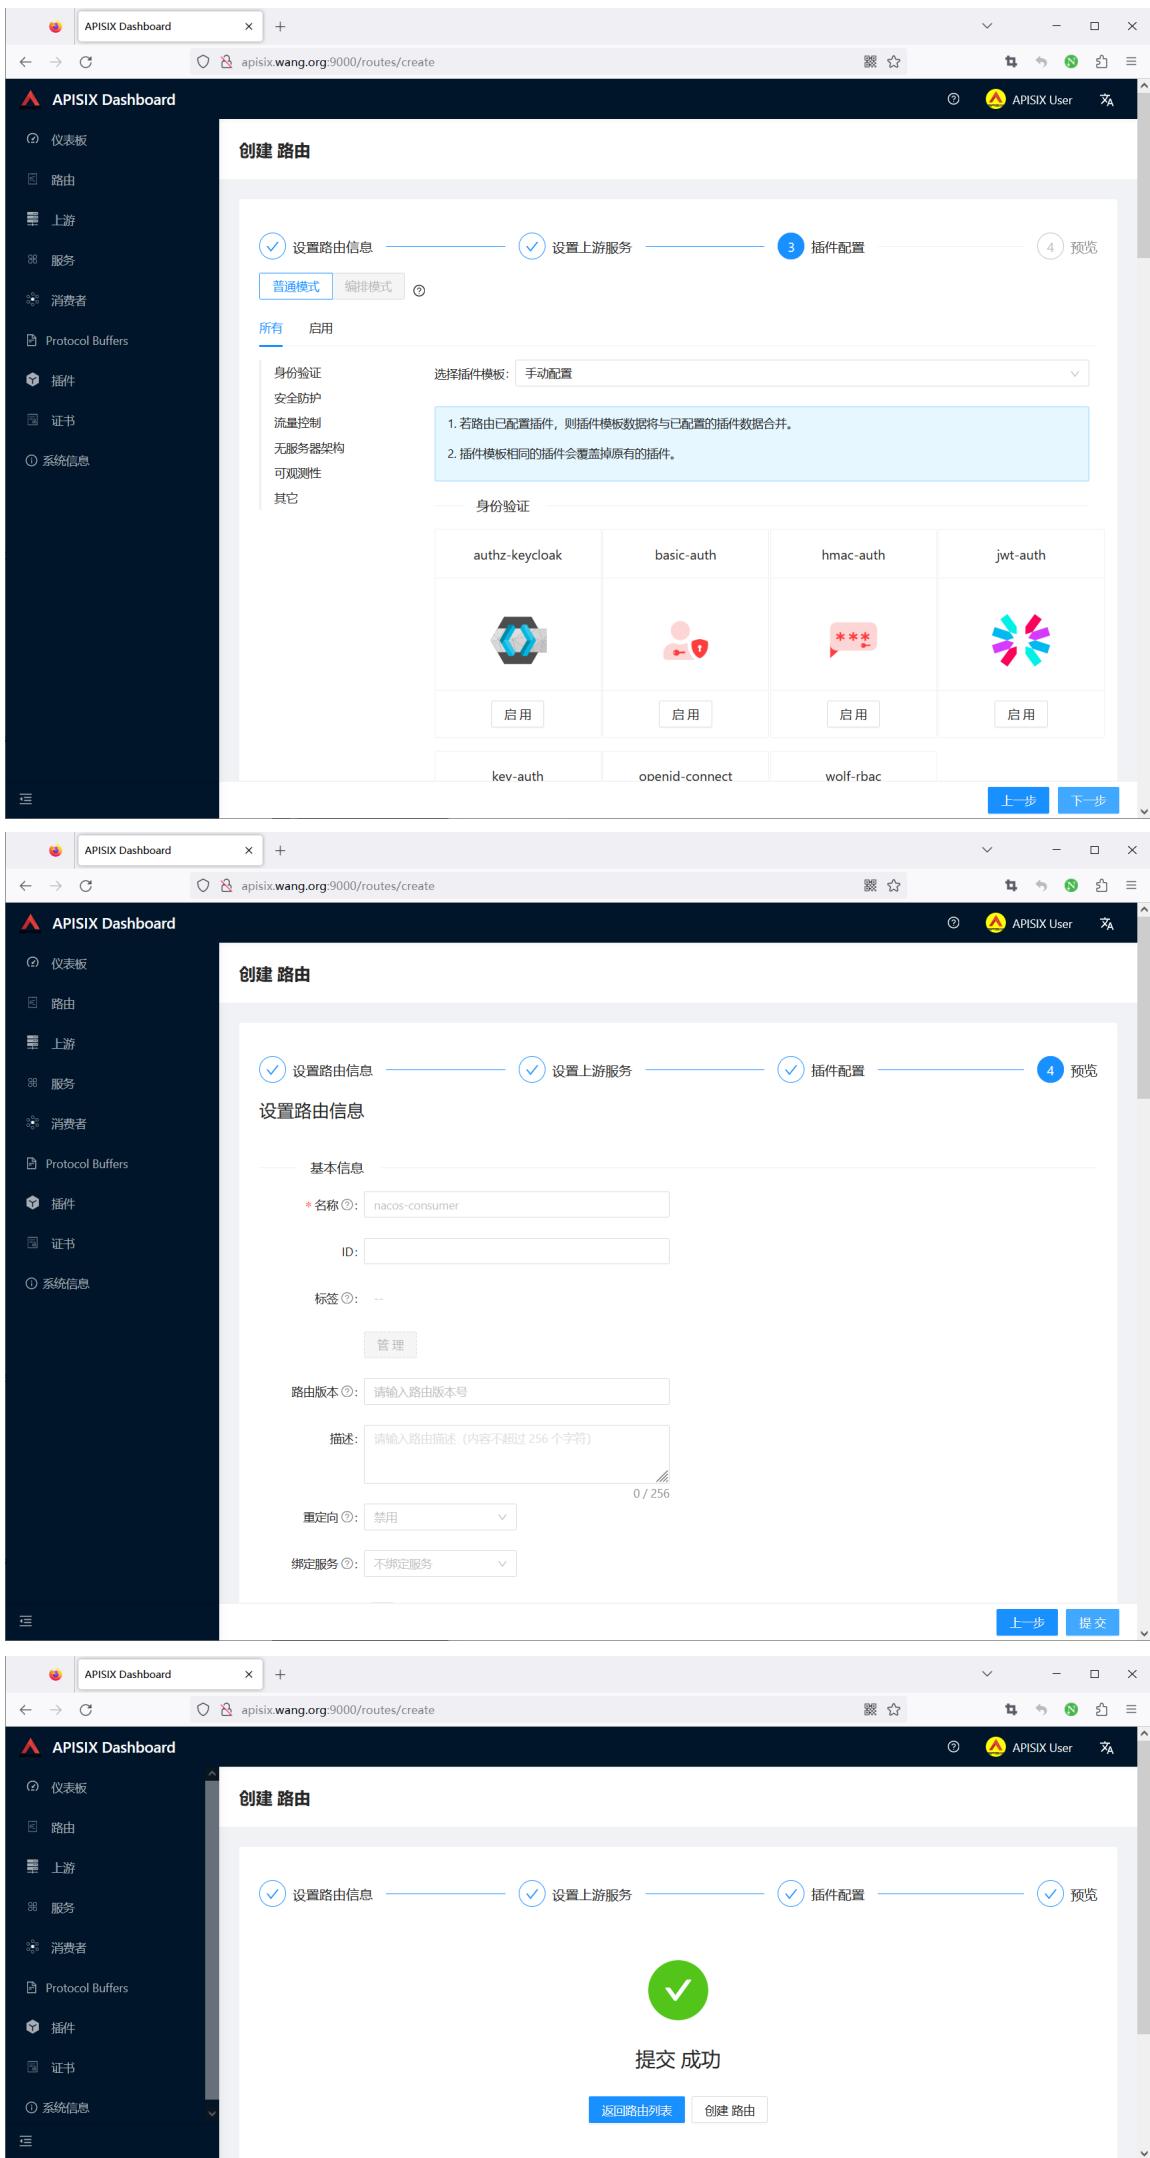
3.2.4.2 方法2: 通过APISIX Dashboard 添加路由
先创建上游服务,nacos不能直接创建路由


3.2.5 通过APISIX网站进行测试访问
[root@ubuntu2404 ~]#curl -H"host: www.wang.org" 127.0.0.1:9080/echo/zhangqing Nacos Discovery Consumer Service Operation Result From : Nacos Discovery Provider Service Message : zhangqing